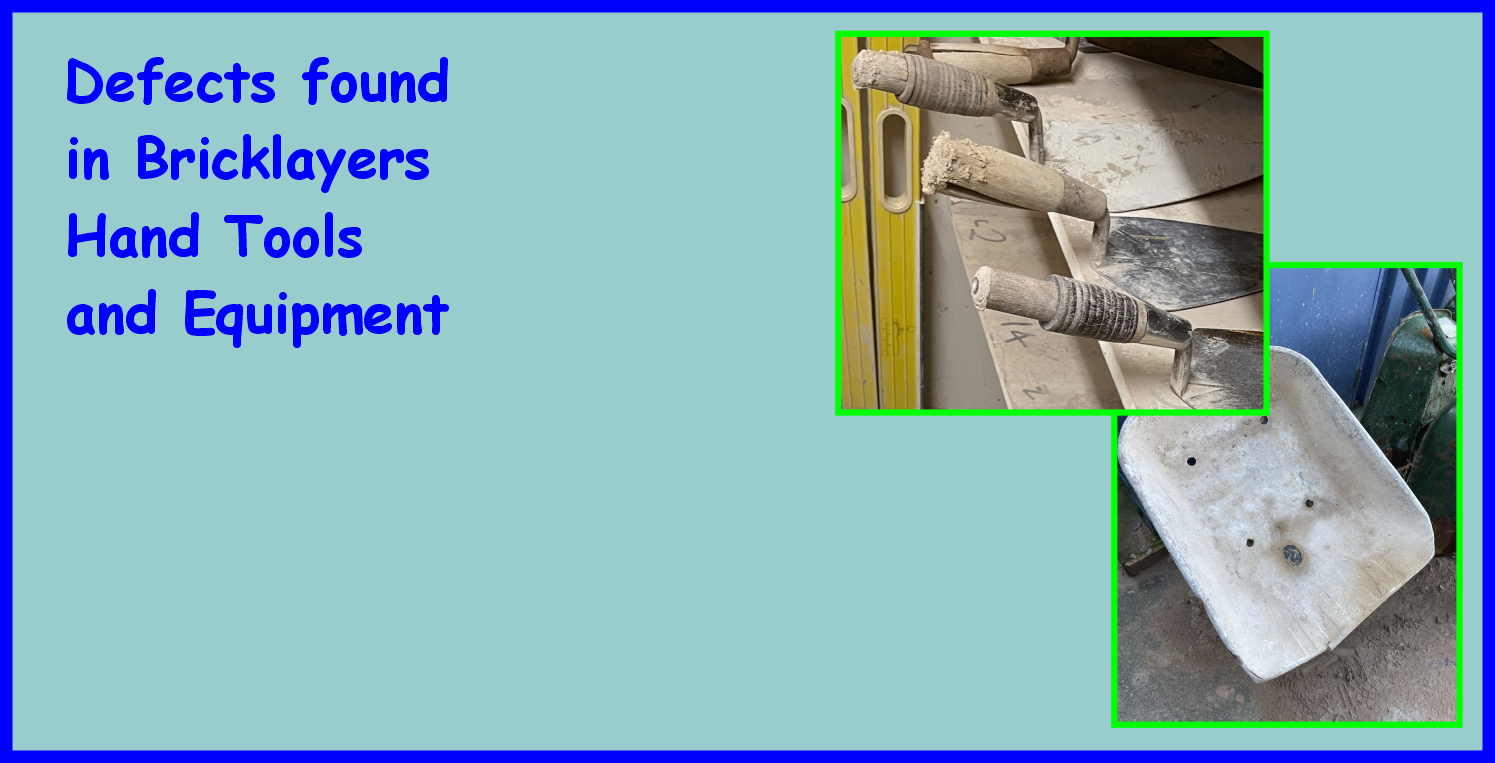
Builder's Square

Tape Measure

Straight Edge
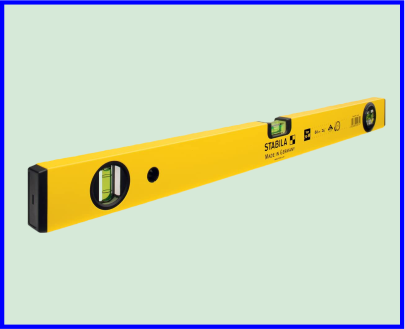
Spirit Level

Ranging Lines

Open Steel Tape Measure

Brick Trowel
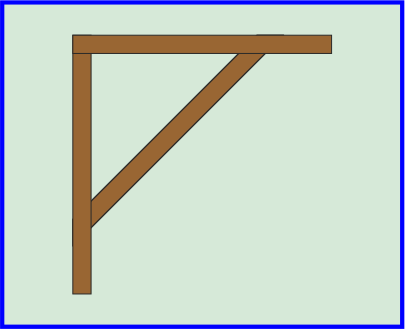
Parts of the Profile Board
Teaching and learning resources for the construction industry with NVQ and Diploma Assessment Criteria
Unit 206 Construct cavity walling forming masonry structures
The aim of this unit is to provide the learner with the
knowledge and skills to construct walling to form masonry structures
The learner will:
3. understand how to erect cavity walling to required specification.
The learner can:
Builder's Square
Tape Measure
Straight Edge
Spirit Level
Ranging Lines
Open Steel Tape Measure
Brick Trowel
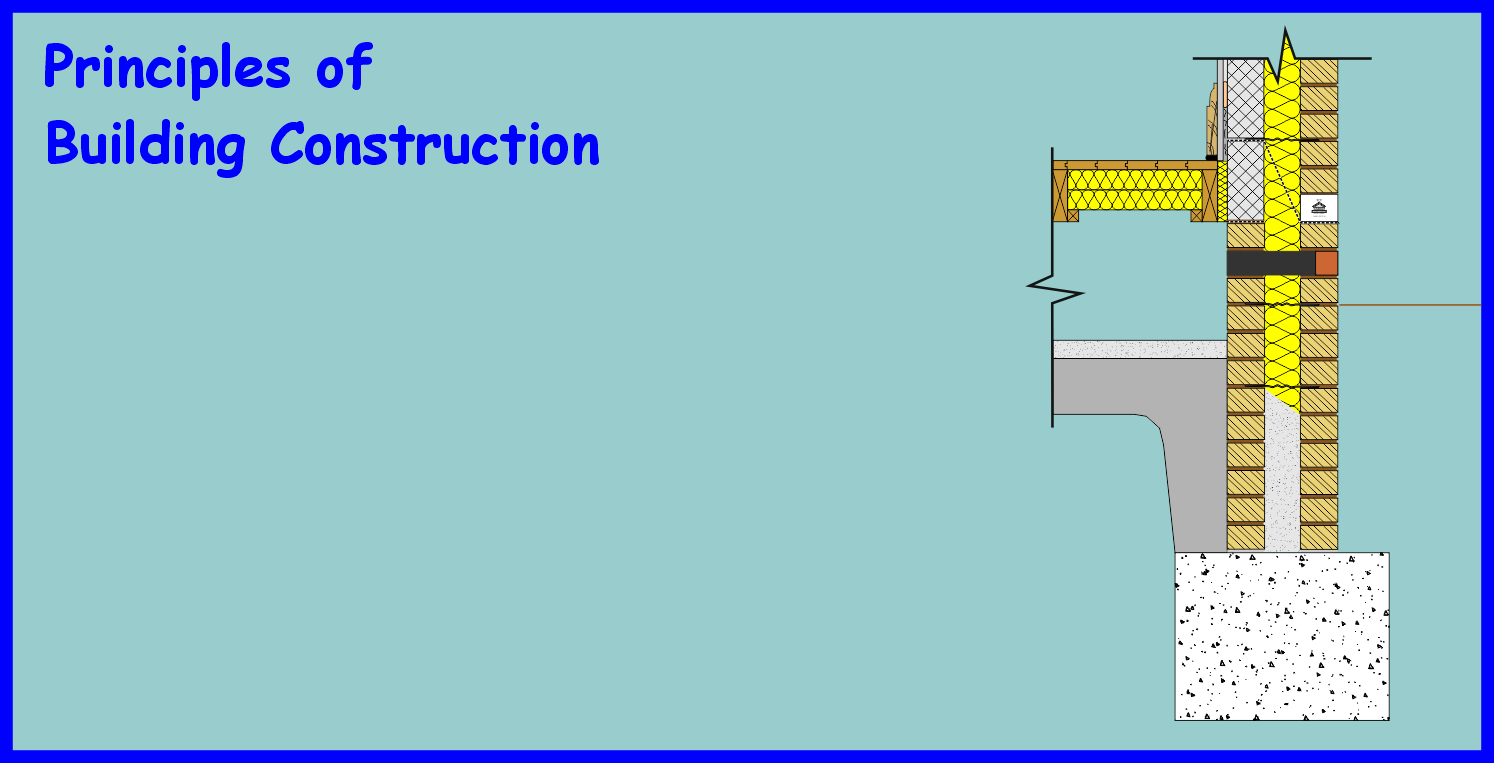
When setting out a new building you need to have a set of profile boards for each external and internal corner, this will help the excavator in digging out the foundations correctly by following the centre line on the Cross-Board.
Bricklayers used to Cross-Board to set out their internal and external walls using ranging lines secured to the Cross-Board.
The Cross-Board can be set to a horizontal D.P.C. level which comes from site datum, this helps the ground workers and bricklayers to correctly set their levels for foundations and brickwork.
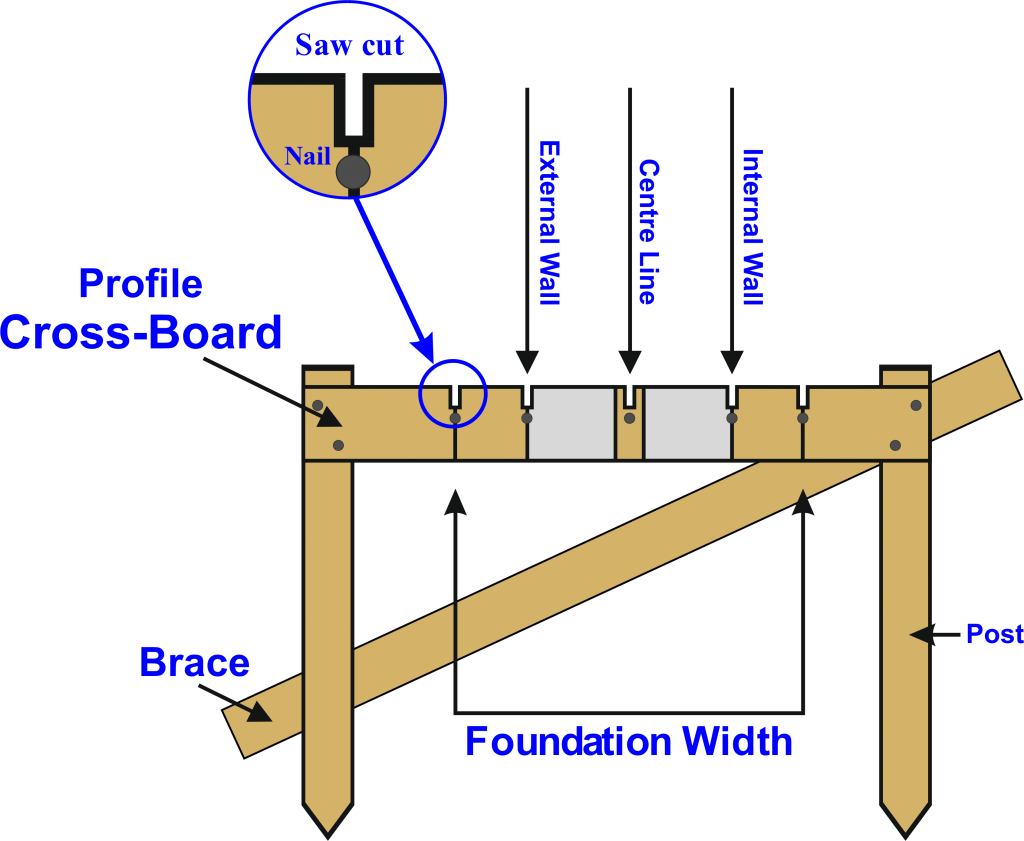
Parts of the Profile Board
Profile Cross-Board can be level with the horizontal DPC which is governed by the site data, this also control the depth of the trench for the foundations.
The Cross-Boards size are 150×35mm boards and they must be 450 mm wider than the trench.
The groundworker will use the centre line on the Cross-Board to guide the excavator bucket when excavating foundations
The pointed post is driven into the ground 450 to 600mm deep and they should be 150 to 600 above ground, they are commonly made out of 50x50mm timbers.
A brace is screwed or nailed to both posts for additional support if needed.
The position of the foundation and internal/external walls are marked on the Cross-Board by a nail or preferably with a saw cut which helps to keep the line in position.
By using a combination of saw cuts and nails you can keep the line taut by wrapping the ranging line around two nails in a figure-of-eight number of times.
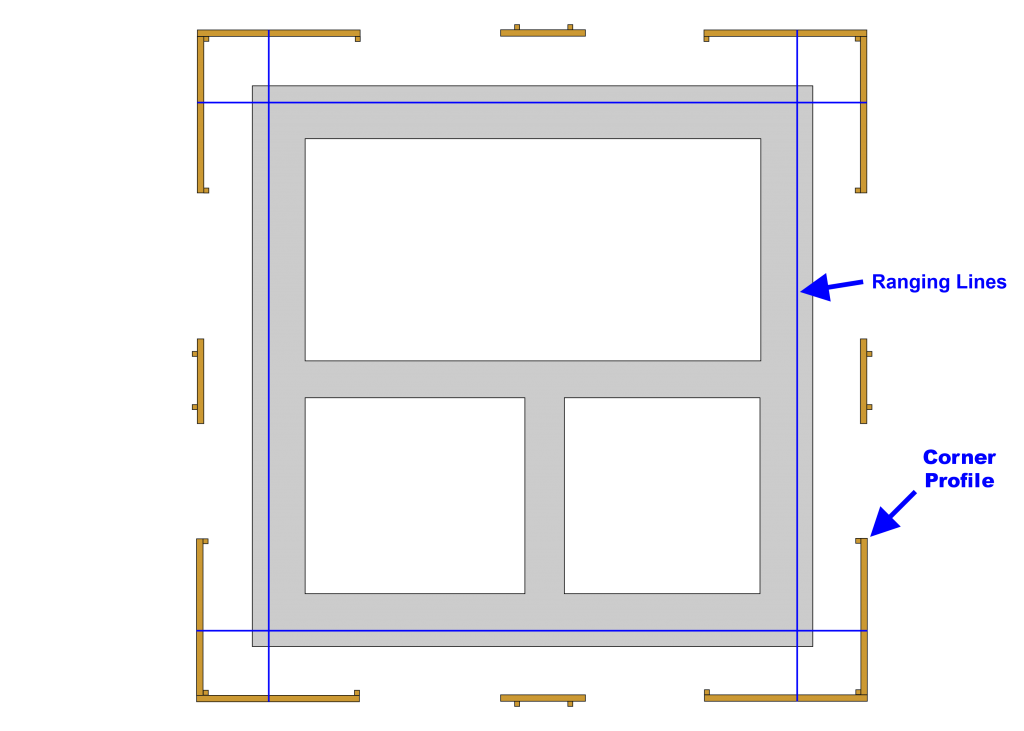
Check that you have enough ranging lines to set out the building, and you also need to check that the profile boards have not been damaged or moved if in doubt speak to your supervisor or site agent.
Ranging lines are attached to the cross boards using screw cuts or nails for the location of the face line of the walls along the length of the trench.
When attaching ranging lines to cross boards and must ensure that the line is not frayed or have any knots in the line.
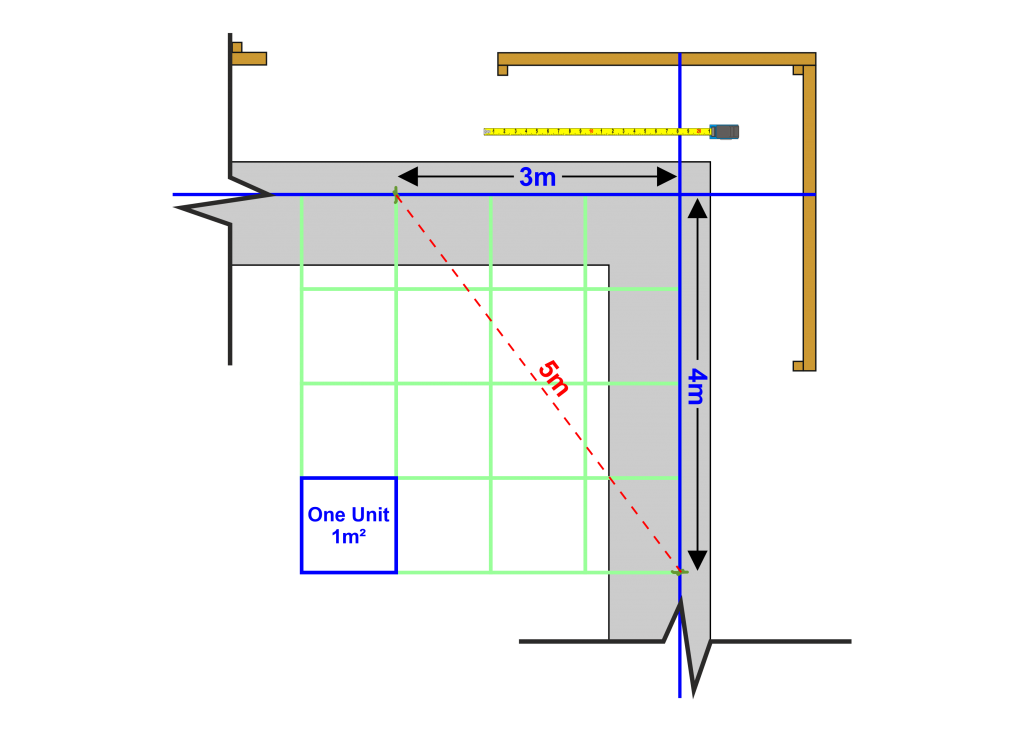
The next stage is to check every corner using a builders square or 3:4:5 method which is a way of forming right angles using trigonometry.
It may sound tricky, but the 3:4:5 rule is not very difficult to understand, for more information click on the link below.
3:4:5 method
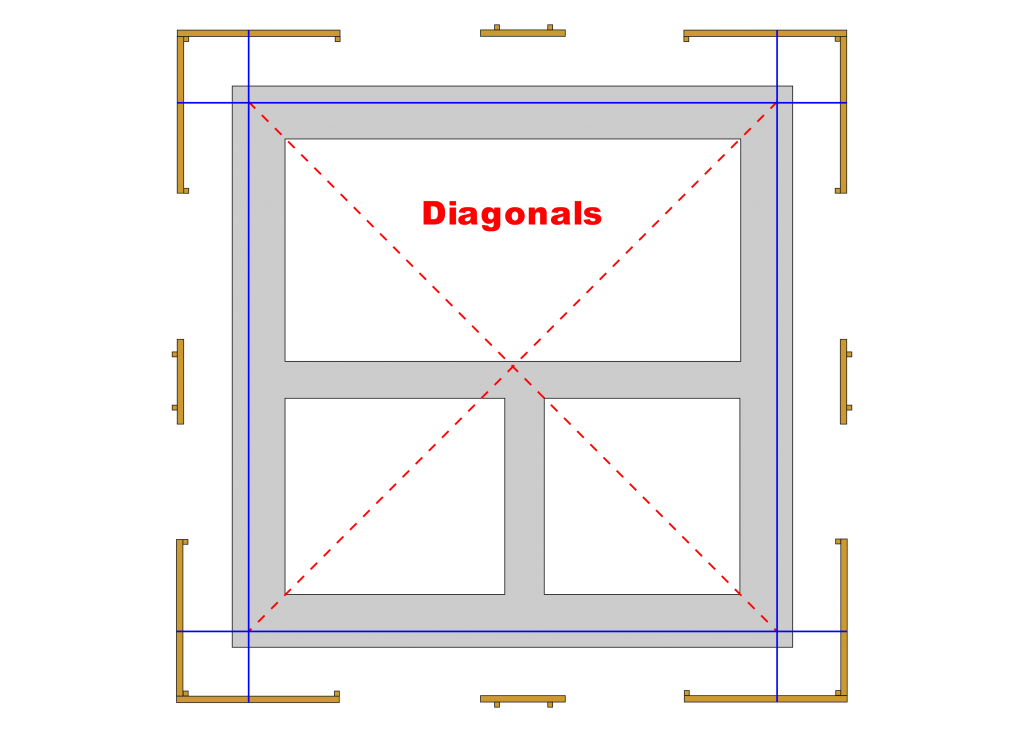
Your final check to make sure that the building is square you must check the diagonals with a steel tape measure if both diagonal measurements are the same the building is square.
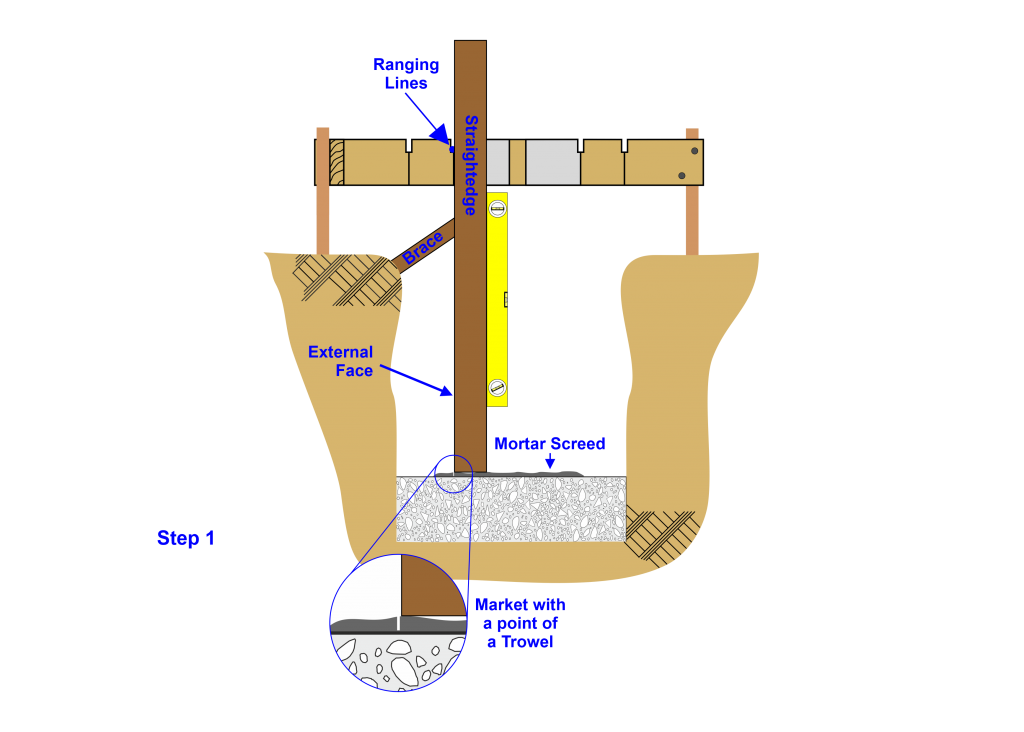
Using your mortar screed you prepared earlier applying the screed wider than the width of the wall and it needs to be about 600 to 900 mm long underneath the ranging lines.
Carefully using a straight edge and spirit level transfer the line onto the foundations by positioning the level at the end of the screed and marking it with the point of the trowel when plumb.
When using a straight edge or spirit level you must ensure that you do not touch the line otherwise you will have inaccuracies on your setting out.
If you find that you can’t hold the straight edge or spirit level steady then use a timber brace for additional support.
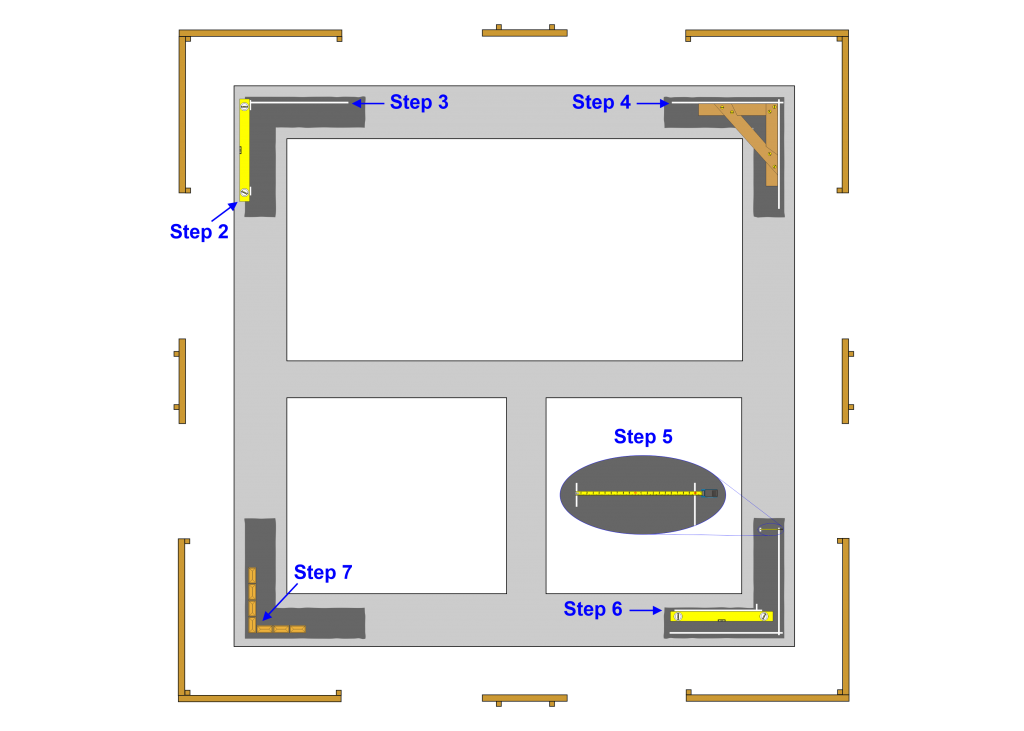
Step 2 places spirit level on the tube marks previously done and using the straight edge of the level join the two marks up using the point of the trowel, making sure you extend the line past a corner of the building which is referred to as a Quoin in brick terminology.
Step 3 and 4 repeat the process as in Step 2, then double-check that the Quoin is still square.
Step 5 using a pocket tape mark out to marks at each end of the mortar screed for the width of the one brick wall or cavity wall by following the floor plan specifications.
Step 6 join up all marks up by using the straight edge of the spirit level, you will need to clean your spirit level as it has been placed on the mortar screed flat.
Step 7 Now you’re ready to start building your Quoin up to concrete finished floor level, ensuring you gauge your brickwork by using a gauge rod or tape measure.
When attaching ranging lines to cross boards and must ensure that the line is not frayed or have any knots in the line.
The next stage is to check every corner using a builders square or 3:4:5 method which is a way of forming right angles using trigonometry.
It may sound tricky, but the 3:4:5 rule is not very difficult to understand, for more information click on the link below.
3:4:5 method
Your final check to make sure that the building is square you must check the diagonals with a steel tape measure if both diagonal measurements are the same the building is square.
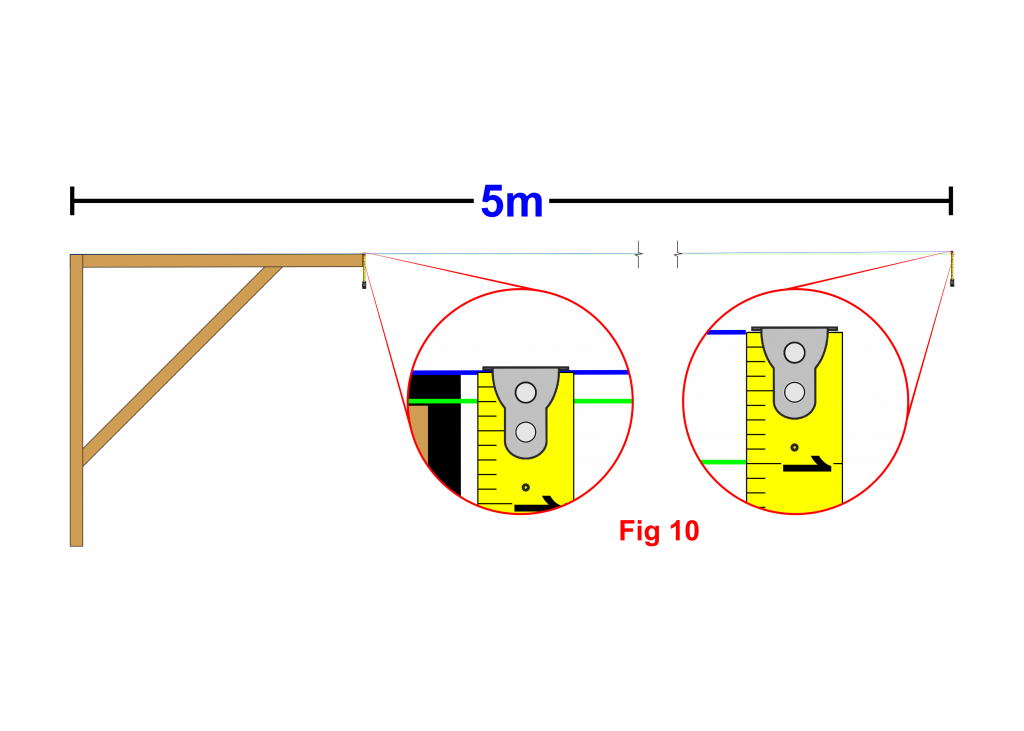
Setting out a building with an inadequate building square will send your ranging lines out of square.
For example in fig 10, the arm of the building square is out by 2mm doesn’t look a lot but over 5m this will increase the inaccuracy to 10mm.
So you must check your building square for adequacy before setting out any square or rectangle shapes in your construction project.