
Teaching and learning resources for the construction industry with NVQ and Diploma Assessment Criteria
The learner will:
2. be able to prepare, set out and build 100mm thick lightweight block walls.
The learner can:
2.1 use Personal Protective Equipment (PPE) appropriate to building 100mm thick block walls
2.2 select the tools, equipment and materials required to build lightweight block walls
2.3 measure and set up profiles to given specifications
2.4 set up mortar boards and stack with the required number of blocks to build 100mm thick block walls
2.5 dry bond blockwork between profiles
2.6 build 100mm thick lightweight block wall to given specifications.
The learner will:
3. be able to set up and maintain a clean and safe working environment.
The learner can:
3.1 set up the work area safely
3.2 maintain a clean and safe working area following health and safety guidelines
3.3 clear work area of surplus materials and debris on completion of the jobs
3.4 clean all tools and equipment ready for re-use.
This guidance document sets out the aspects of this unit where the demonstration of skills, knowledge and understanding to the required competence must be assessed.
It indicates where assessment opportunities occur within the work plans, assignments, student’s handbook and question paper.
Each student must work individually to complete all of the practical activities, assignments, completion of their handbook and the unit question paper.
Where team activities are carried out, each student must be assessed in the lead role.
Students must carry out all work activities safely.
Correct PPE should be selected and worn, or used, as appropriate.
There must be no risks to self or others and no risk of environmental pollution.

The following Safety Rules should apply:
1. Before, during and after carrying out any work, the workplace must be clean and tidy to prevent tripping and falling
2. Organise the work and set up tools and equipment
3. Check all equipment is in good working order.
Setting up to carry out your work effectively and efficiently can save time and risk of injury to yourself and others
4. Always wear protective clothing:
Gloves when handling materials and components
Boots in case of impact injury
Mask in dusty atmospheres
Ear defenders in noisy conditions
Goggles to protect eyes from flying debris
Helmets at all times when on a building site
5. Be aware of emergency procedures in the event of an accident:
Who the first aider is
Where the first aid box is located
How to fill in the accident book
Report accidents to the person in charge
6. In the event of fire:
Carry out the correct emergency procedures for calling for help and evacuate the building

Are You In Control
This activity looks at the how bricks and blocks are laid to line in terms of their:
· Bonding
· Accuracy
· Finish
Outcomes
By the end of this activity, students should be able to:
· Mark Out a Gauge Rod for Brick Courses
· Mark Out a Gauge Rod for Block Courses
· Select and Name Correct Tools and Equipment for Laying Bricks and Blocks to Line
· Mix Mortar
· Work Out the Required Number of Bricks/blocks/bats/closers
· Lay Bricks and Blocks to Line and Gauge
· Check That Levels, Face Deviation and Perpends Are Within Allowable Tolerances
· Point Up the Joints on Facework
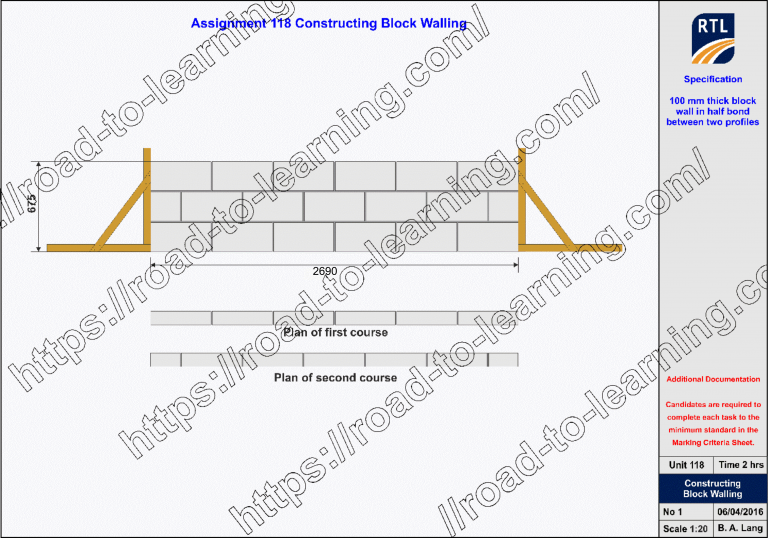
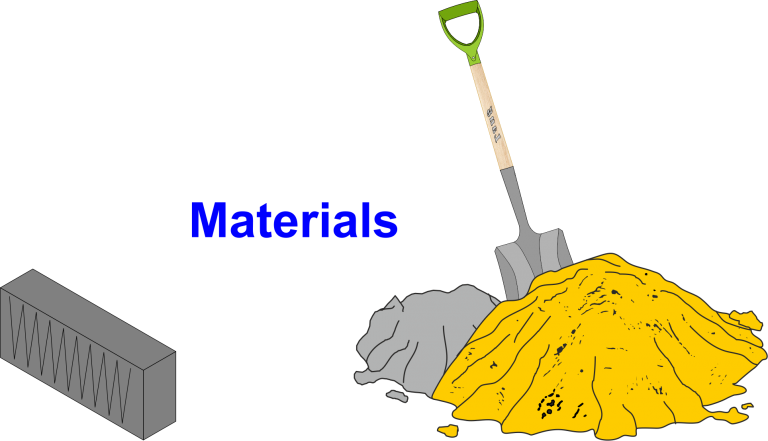
The assessor will ask you if you’re ready to do the assessment, if so you will need to study the working drawing above, to identify and list all the P.P.E., Materials, Tools and Equipment required to
build a Half Brick Thick Wall

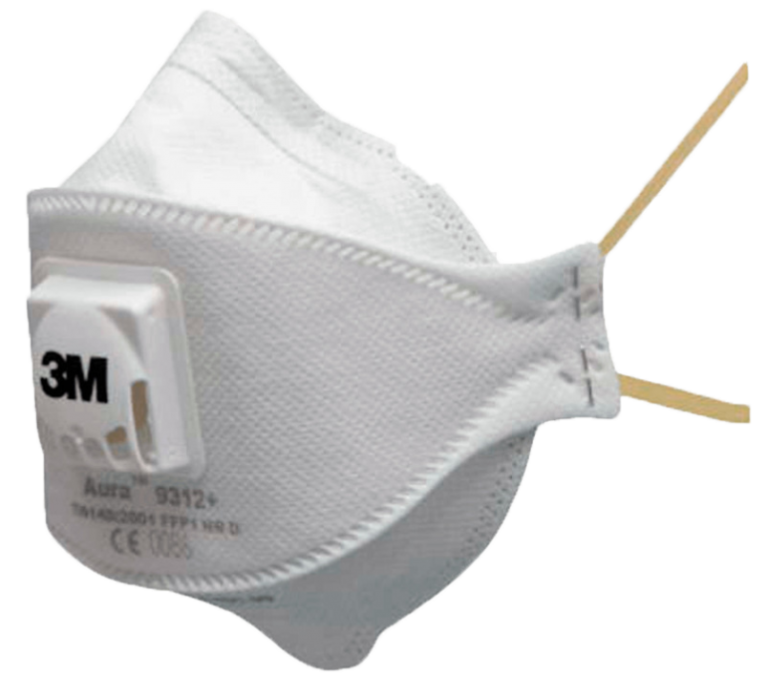
Selected of P.P.E.
Tools & Equipment

Tools and Equipment
The first stage in building a wall is to sweep the assessment area ensuring that you clear away debris where the Blocks are going to be laid.
Remembering to use your P.P.E., normally assessment areas in a training centre are very dusty you will need to wet the surface area down with water before using your sweeping brush.


To strike the face line for this assessment you will need two bricks, a line and pins and a pencil.
Unwind a length of string line sufficient to span the assessment area plus the profiles, wrap the string line around brick 2 to 3 times then run a taut string to the length of your profiles and face line.
Using a pencil marks the start and end of the string line, using a long straight edge placing the edge onto both marks, complete the face line.
If you haven’t got a long straightedge you need to do two additional marks from both ends to the length of your level and strike the line between both marks at each end.
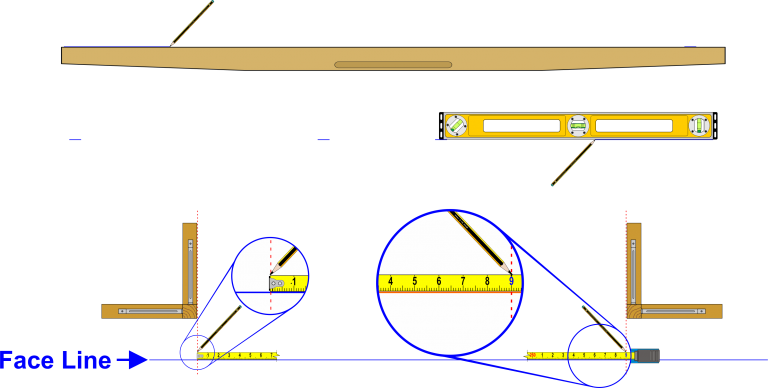
Now you have marked the face line you need to mark the start of the wall and the end of the wall onto your face line, ensuring you have enough face line for your profiles on each end.
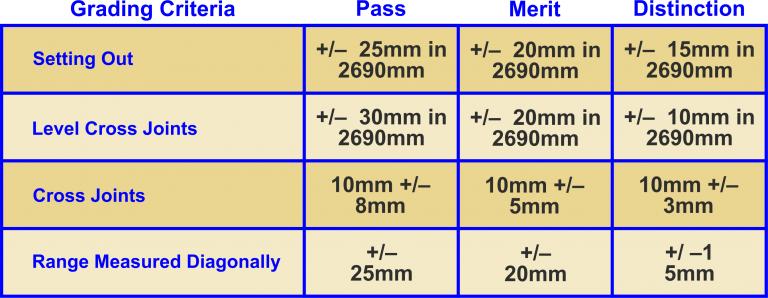
Setting out Tolerances for this block walling:
Pass: +/– 25mm in 2690mm
Merit: +/– 25mm in 2690mm
Distinction: + –15mm in 2690mm
You need to check the profiles for any damage and they have sufficient upstand to carry out your assessment to the required courses of blocks.
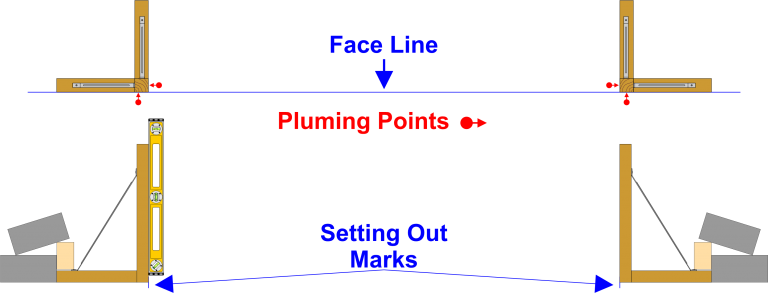
Each end of your block wall requires a profile with the upstand of the profile placed on the marks previously made and in line with your face line.
Before you secure your end profiles with blocks you need to check for plum the face edge and stop end of the wall which is indicated in the image.
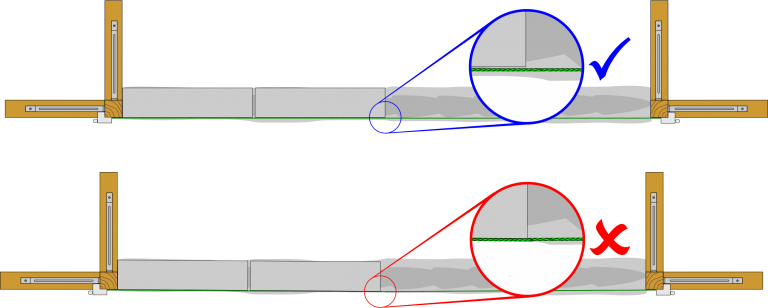
When setting out a building is good practice to place a course of block to gauge along the length of the wall in Dry Bond which is laying blocks without mortar on the bed and perp joints to the co-ordinating size of 450mm which is the working size of a block with perp joint.
Generally, architects will design Buildings with the aid of a block dimension table to minimise cuts during construction.
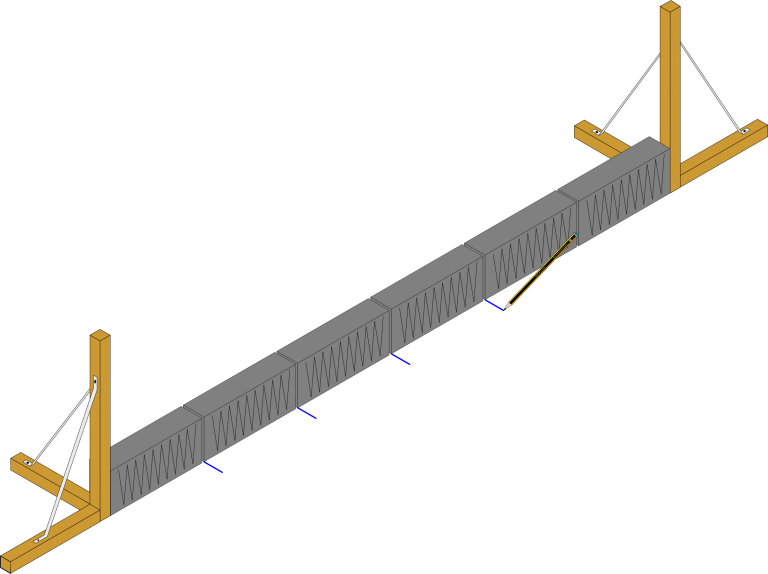
Marking out Perps Joints to Block Gauge
For additional information on this topic click on the link below:
A typical cavity wall will have inner skin of lightweight blocks which require 10 blocks 1m², if the blocks are laid flat you require 20 blocks per 1m².
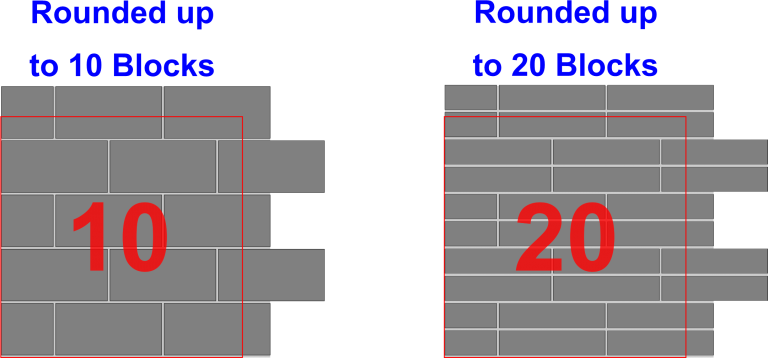
Red Square equals 1m²
For additional information on this topic click on the link below:
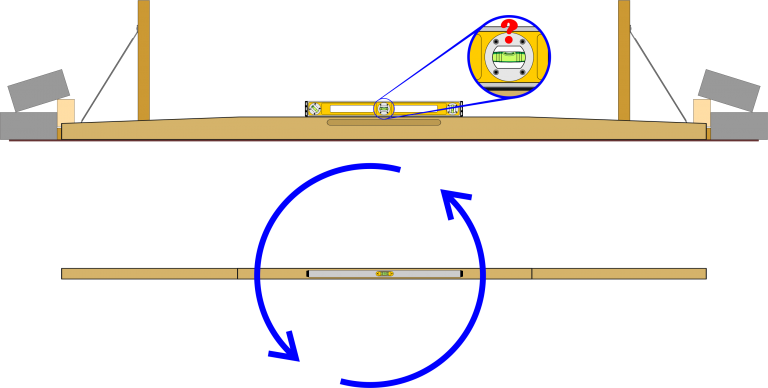
You need to check your assessment area for level between the profiles, this ensures that your gauge rod is placed on the highest point in your assessment area.
This will ensure that you have a minimum of 10mm mortar bed.
When checking levels with a spirit level and straight edge remember to reverse the spirit level and straight edge to double-check the accuracy of the level.
For additional information on this topic click on the links below:
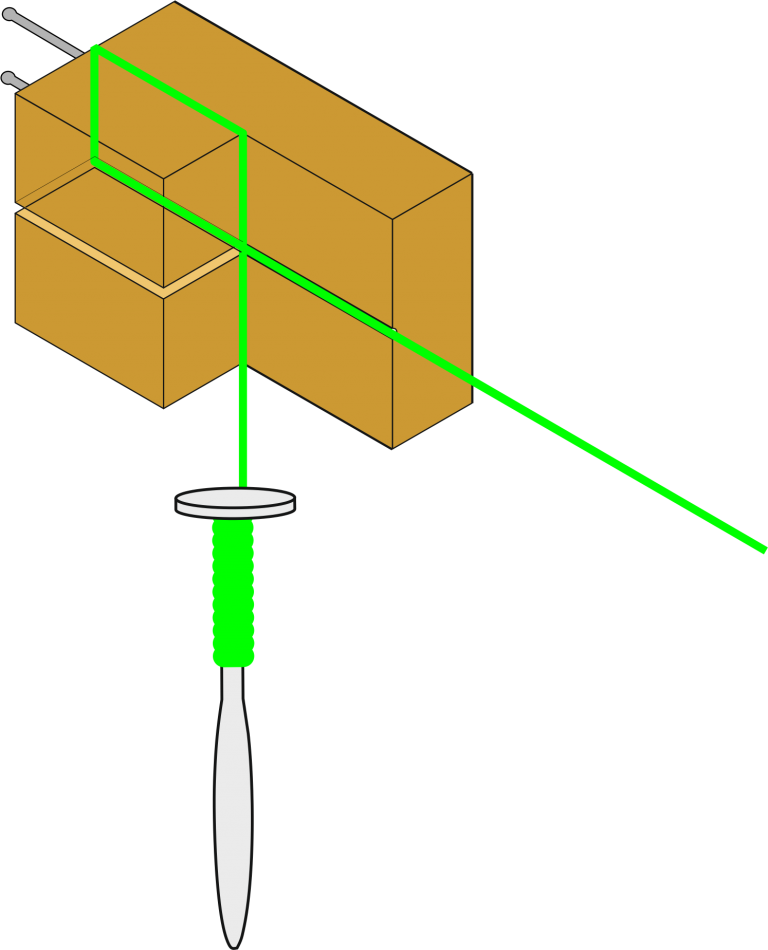
Corner blocks are used in preference to pins as they eliminate making good pinholes and they are less likely to disturb the corner.
The function of a corner block is to hold the line taut and at the correct height so that the bricks or blocks can be laid to the level.
Corner Block are used in pairs and they come in different materials and shapes.

Previously you use a Straight Edge and Level to work at the highest point between the two profiles placed the gauge rod against the profile which is the highest point on the assessment area.
Transfer the first-course mark on your gauge rod onto the profile using a pencil this will ensure that you have a minimum of 10mm bed joint.

Fix corner blocks at each end and pull the line so that it is taut this will enable the string line to support the Line Level to sit on the string line without creating the line to sag when checking for level.
Attach the Line Level to the middle of the line using the small hooks on the line level, if you find that the String Line is not level, then raise or lower the corner block opposite end to your gauge marked profile.
For additional information on this topic click on the links below:
Brick Lines
Line Pins And Corner Blocks
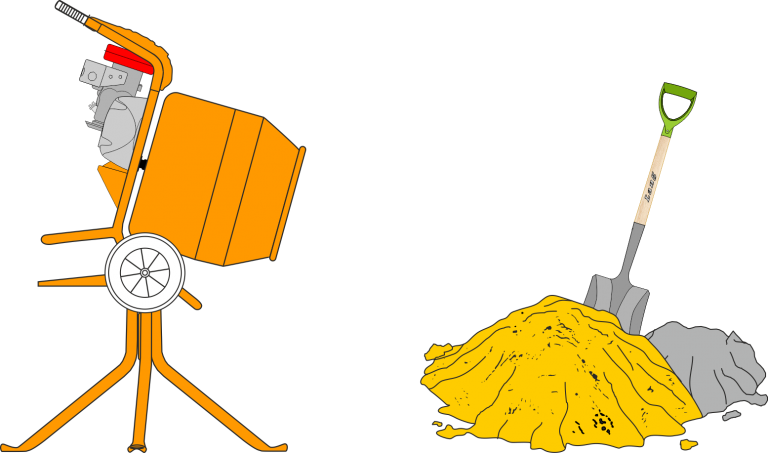
For ease of mixing the area should be flat, hard, e.g. Concrete, mixing board, and free from dust and other debris.
It is important that stones are not mixed in with mortar as these can affect the true laying of bricks and blocks.
Mortar will stain the surface over which they have been mixed even when the area is washed down after the mixes are used.
An area should be chosen where stains do not matter.
If possible, the area should also be close to where the work is taking place and/or near the stored materials.
The area should also be large enough to enable you to use all the tools and equipment Safely.
For additional information on this topic click on the links below:
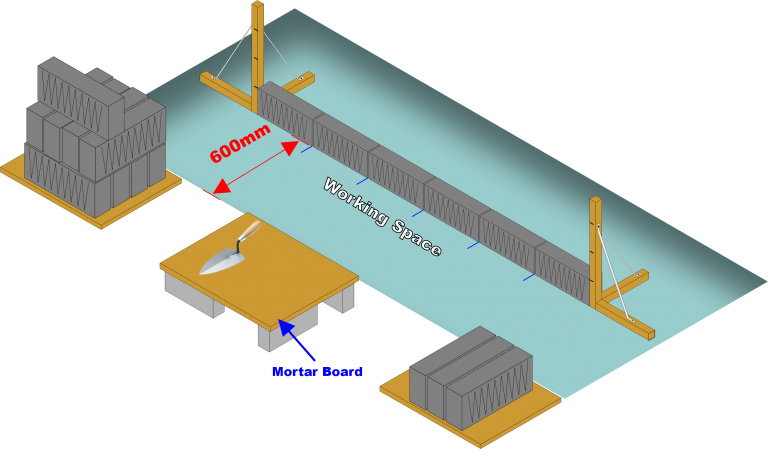
loading out the blocks and mortarboards alternatively running along the face of the wall Leaving 600mm for the working area from the face of the wall to the materials.
Blocks stacked on edge with the face of the block away from the mortarboard
If you’re on the first lift which is from horizontal dpc level then you need to think about putting boards underneath of the brick stacks or blocks, to stop them absorbing water from the ground or contaminating the bricks or blocks.
Mortarboards normally 600x600mm and are placed onto concrete blocks on edge and the boards are whetted down so they don’t absorb all the moisture from the mortar mix which will weaken the mix and workability.
Blocks which are adjacent to the mortarboards must have the face of the brick facing away from the spot board this ensured that no mortar is splashed onto the face of the brick.
At the end of the day, all mortarboards are cleaned and placed on top of the brick or block stacks to protect them from the rain.
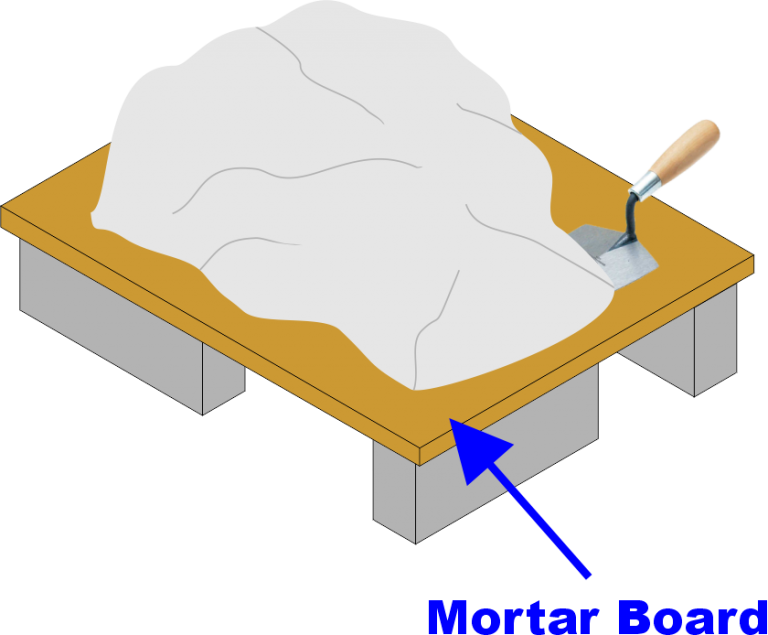
Now you set up your workstation and you’ve mixed up your mortar to the right consistency, wet the mortarboard before loading mortar onto the centre of the board.
Some bricklayers like a full mortar board enabling them to cut into the mortar and pick up the mortar in pasty-shaped.
Alternative methods is to use your trowel and pull away a small amount of mortar in a sawing action, roll the mortar along the board until it looks like a sausage.
Using the edge of the trowel to slide under the mortar in a forward motion to pick up the mortar.

Placed each corner block onto the end profiles making sure that the line is taut, adjust each corner block so that the line is the same height as your gauge rod markings.
Standing in your working space pickup a trowel of mortar and with the trowel just off the ground, swing your arm back towards yourself, turning your wrist, allowing the mortar to slide off the trowel along the string line this is known as the bed.
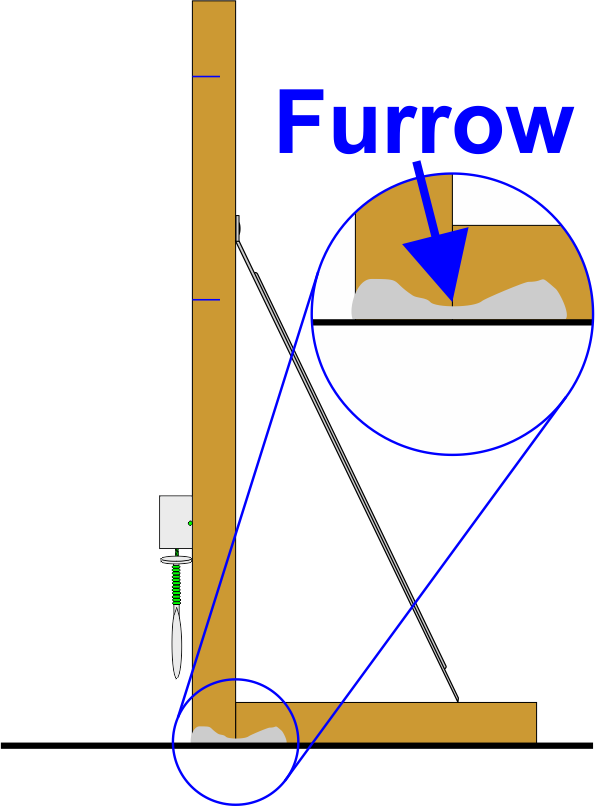
To complete this process using the point of the trowel make a v shape indent which is known as a furrow to the length of your mortar bed.
The first block should be laid to line and the face of the block should be set back slightly from the string line, otherwise you will foul the line which will cause a bowl in the face of your wall and be out of plumb.
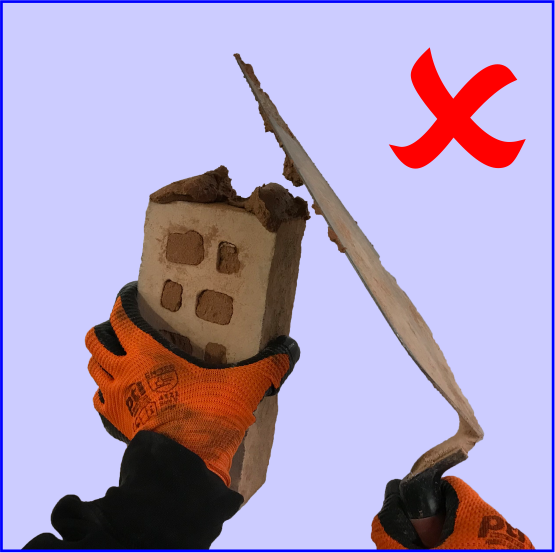
Buttered Up the Wrong Way
The next block should be ‘buttered up’ just like you would do with a brick.
The trowel should be used to cut away excess mortar that is squeezed out from underneath or in between the block.
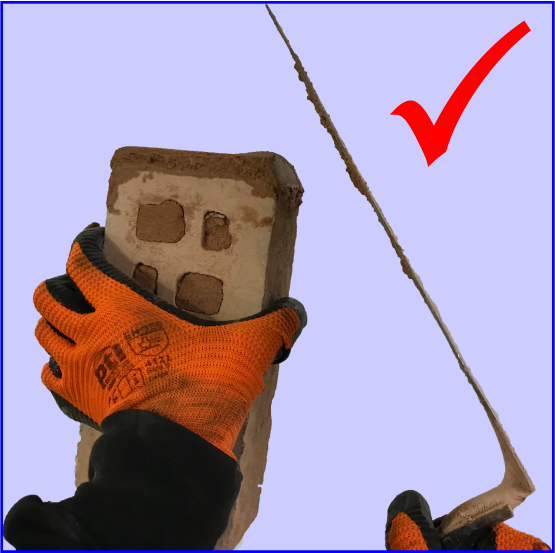
Buttered Up the Right Way

Before starting in the next course of blocks double-check that your course work is level.
Stretcher bond is created by overlapping blocks halfway, this is achieved by incorporating cut half-blocks on each end of the wall, on alternate rows to keep the correct bond

Now you have cut your half-block placing safely to one side, move your corner blocks up to the next gauge mark on your end profiles.
Start the second course of blocks with your half-block then lay 5 blocks with another cut half-block on the end of your course work.

To complete your assessment you need to repeat the first course up to 3 courses of blocks.

Remember to remove surplus mortar that has been squeezed out from the joints.
Don’t forget to wear your Personal Protection Equipment when needed, you still being assessed as you pack away your tools and equipment.
Check that the face of the brickwork is flat with the straight edge and that the perpends are in line.
Fill any gaps in the joints with mortar, using a pointing trowel to press the mortar into the joint.
When the mortar has dried out sufficiently point up the brickwork with a jointing tool.

Assessor Checking Work
Clean your working area off surplus Materials and Debris on completion of the job.
Clean all Tools & Equipment ready for reuse.
Double-Check your work and your area against the assessment criteria before calling over the assessor who will then ask you questions on this assessment.
This task can be achieved at Pass, Merit or Distinction within the tolerances in the Grading Criteria.
Grading Criteria Unit_118