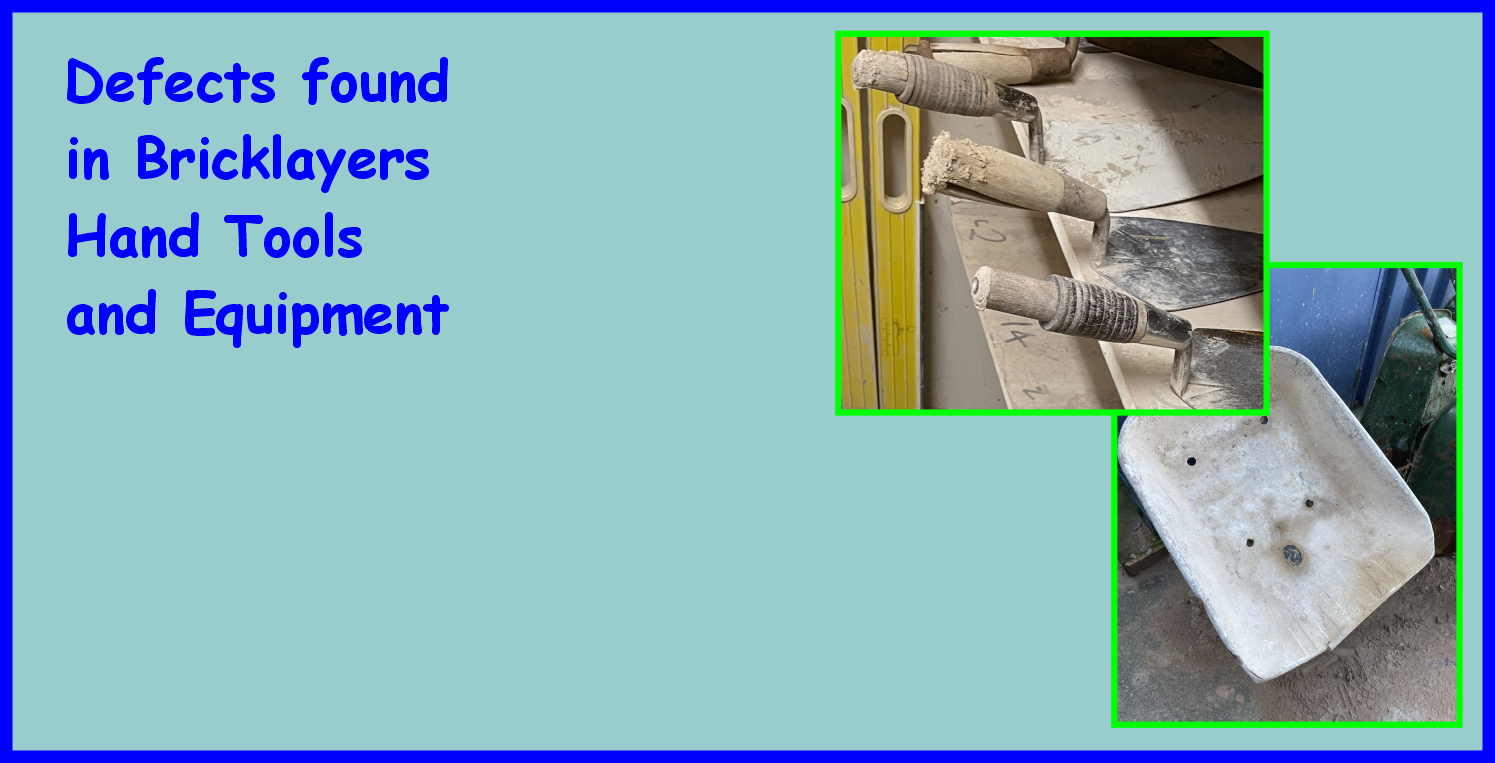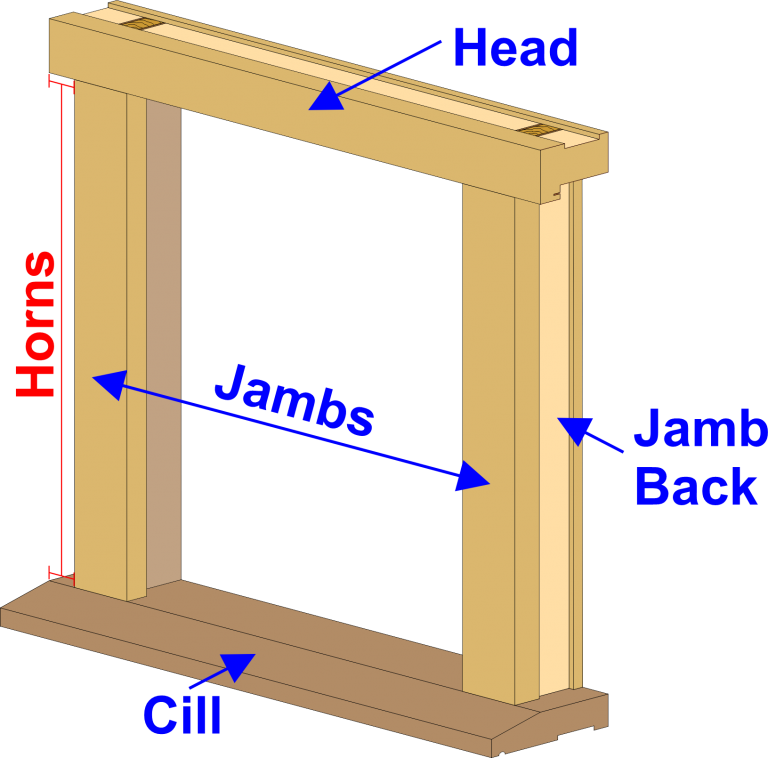
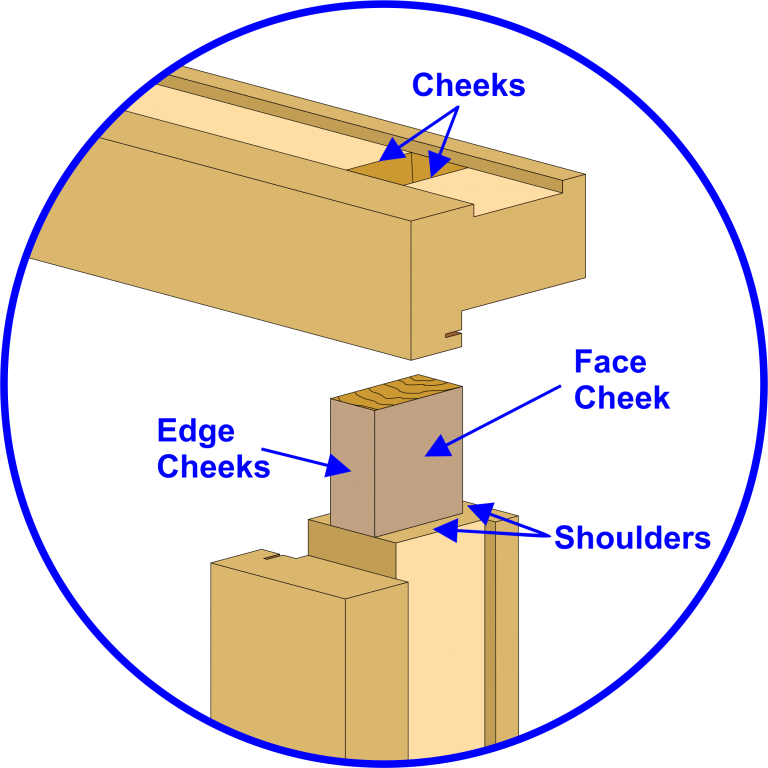
Parts of Through Mortice & Tenon Joints
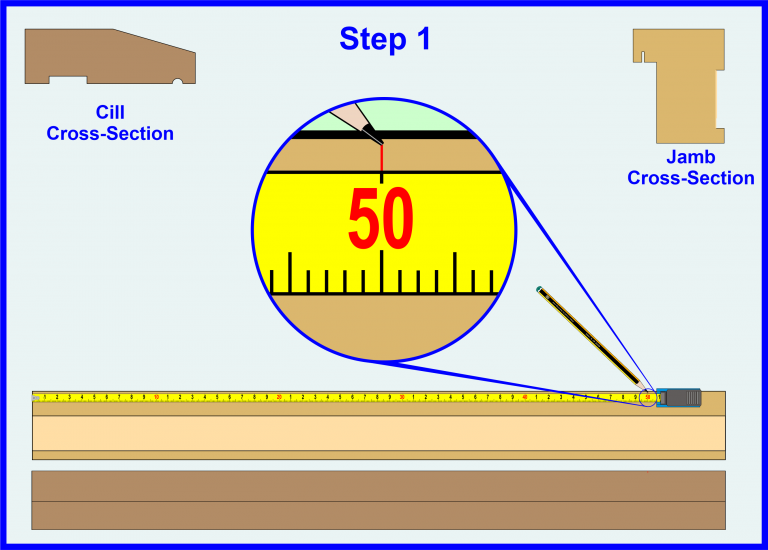
Through Mortice & Tenon Joints Step_01
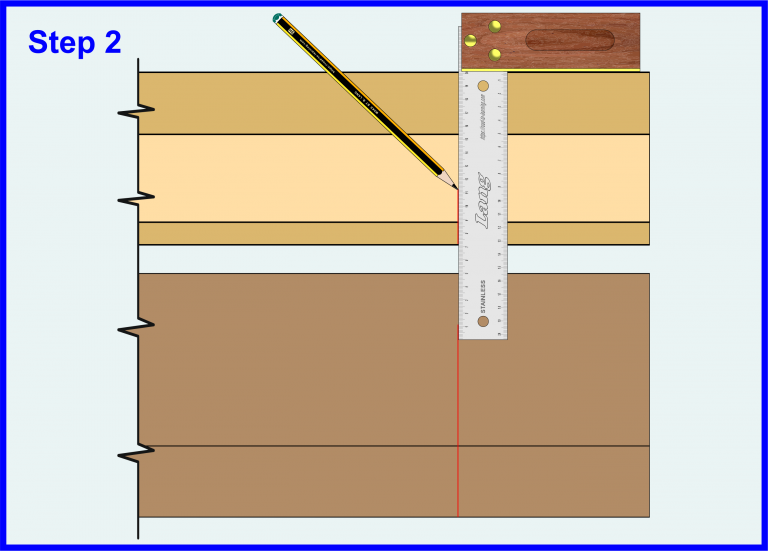
Through Mortice & Tenon Joints Step_02
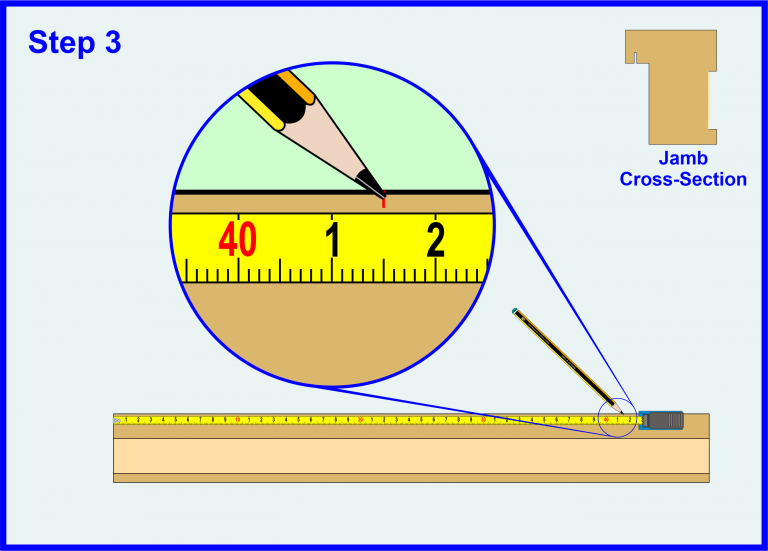
Through Mortice & Tenon Joints Step_03
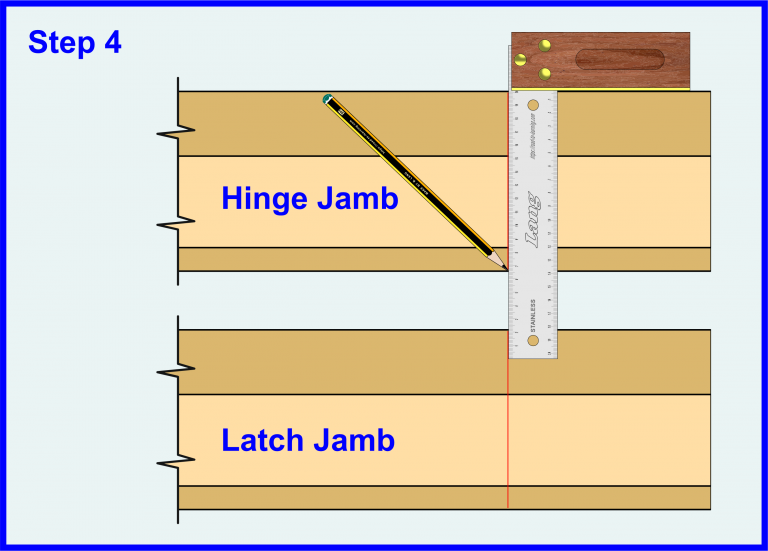
Through Mortice & Tenon Joints Step_04
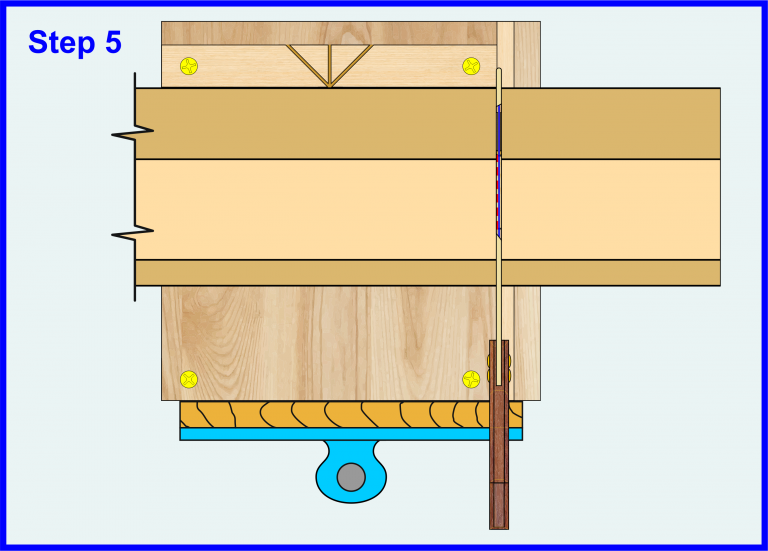
Through Mortice & Tenon Joints Step_05
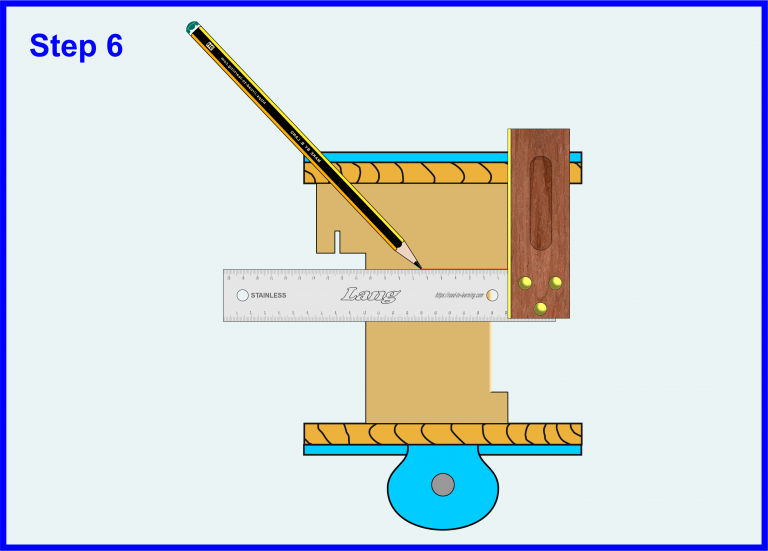
Through Mortice & Tenon Joints Step_06
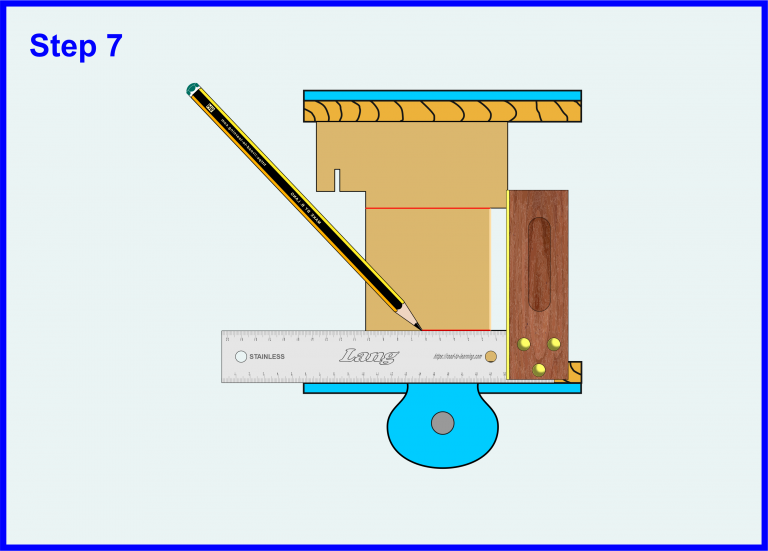
Through Mortice & Tenon Joints Step_07
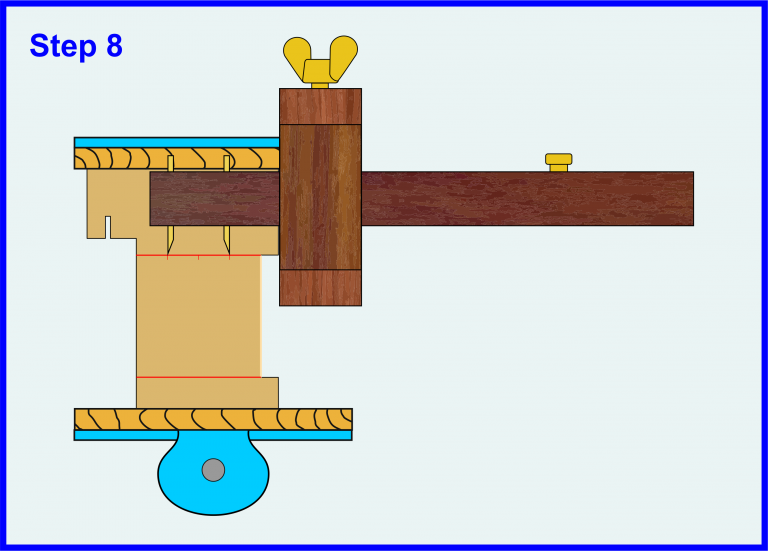
Through Mortice & Tenon Joints Step_08
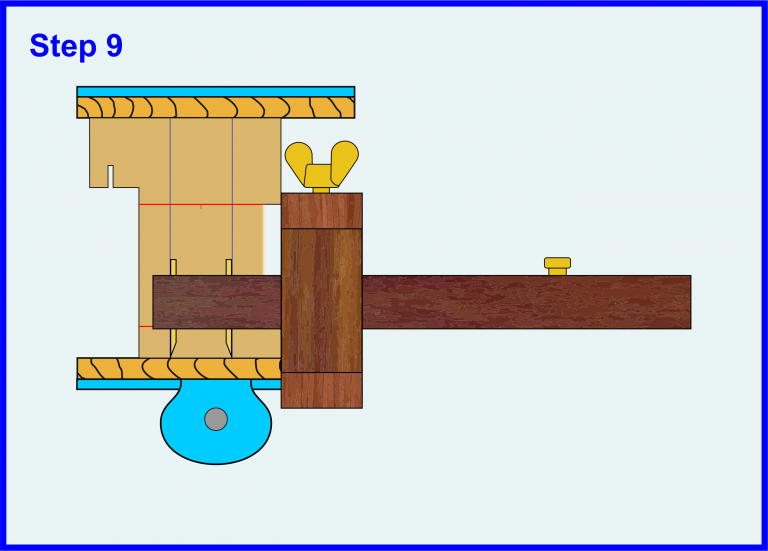
Through Mortice & Tenon Joints Step_09
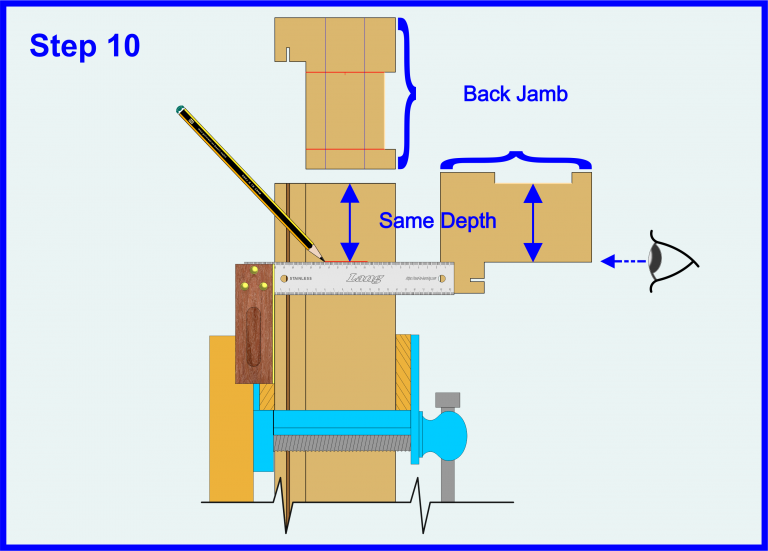
Through Mortice & Tenon Joints Step_10
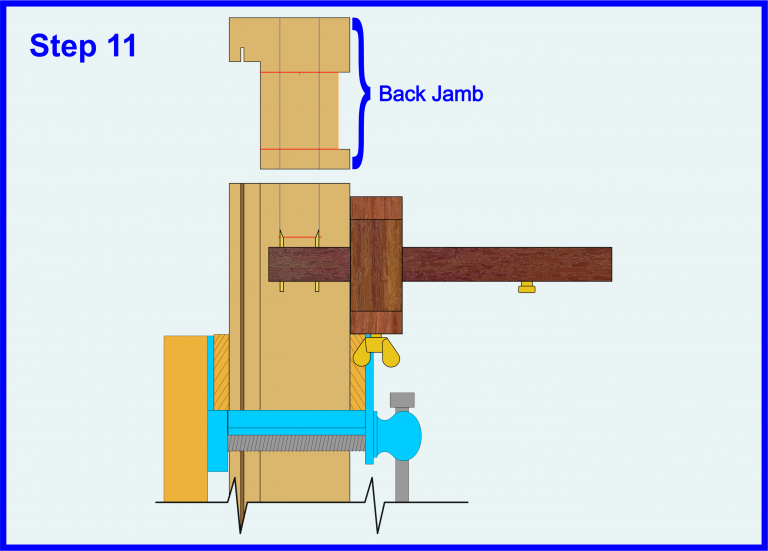
Through Mortice & Tenon Joints Step_11
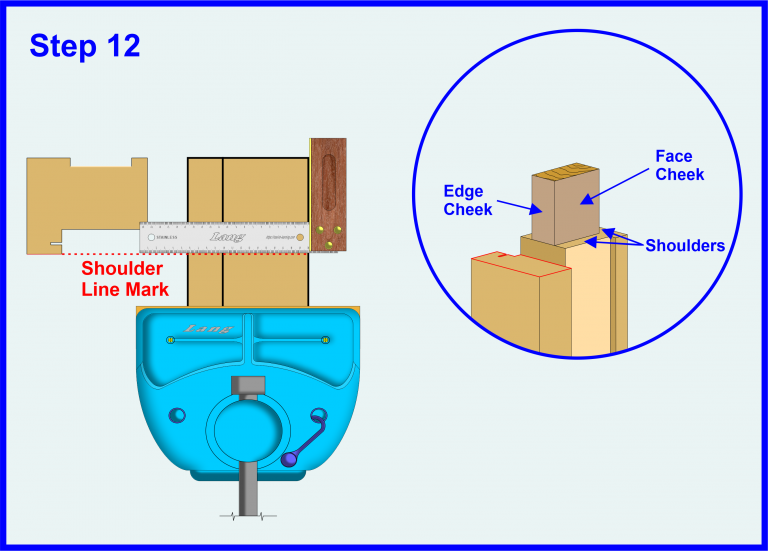
Through Mortice & Tenon Joints Step_12
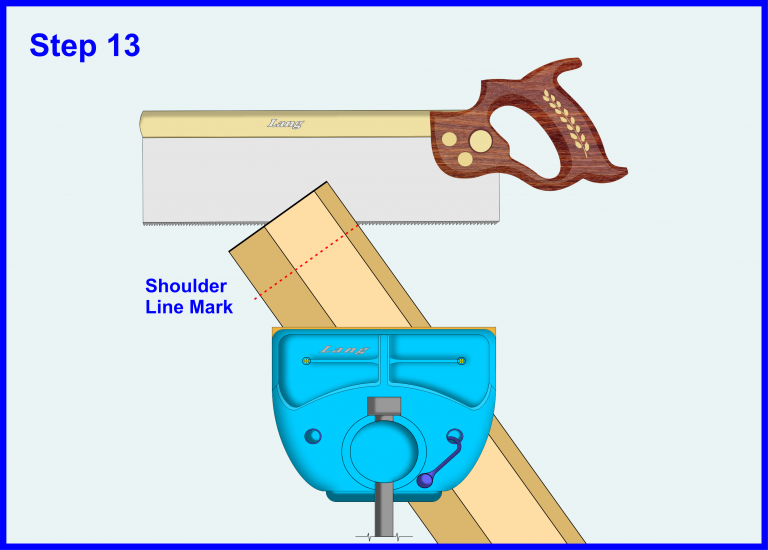
Through Mortice & Tenon Joints Step_13
Through Mortice & Tenon Joints Step_13
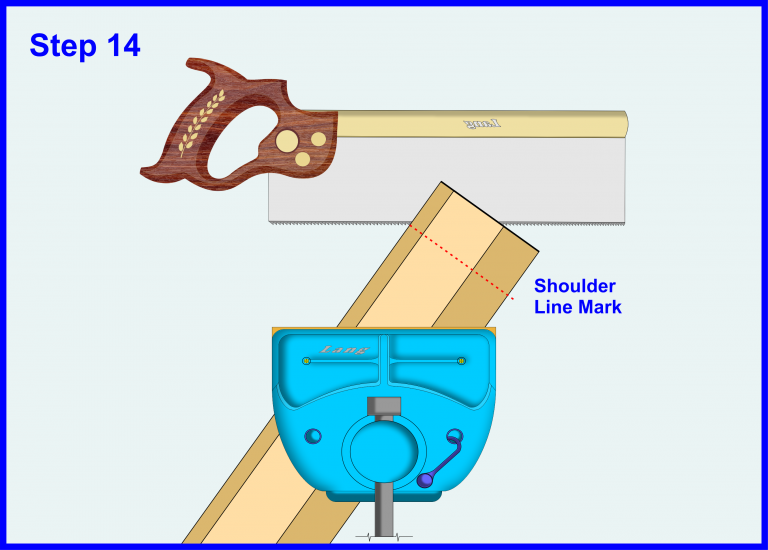
Through Mortice & Tenon Joints Step_14
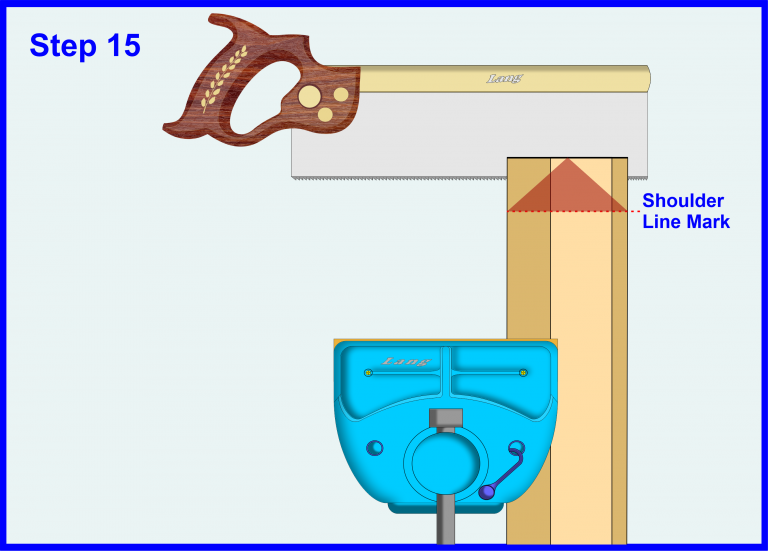
Through Mortice & Tenon Joints Step_15
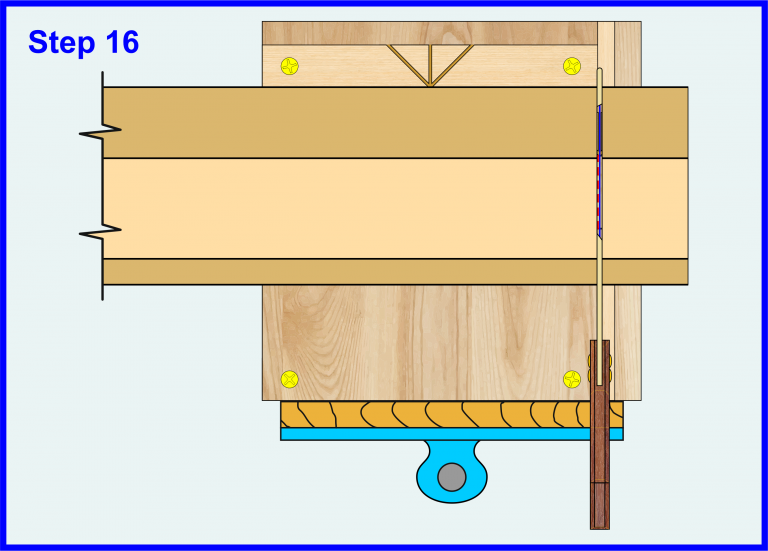
Through Mortice & Tenon Joints Step_16
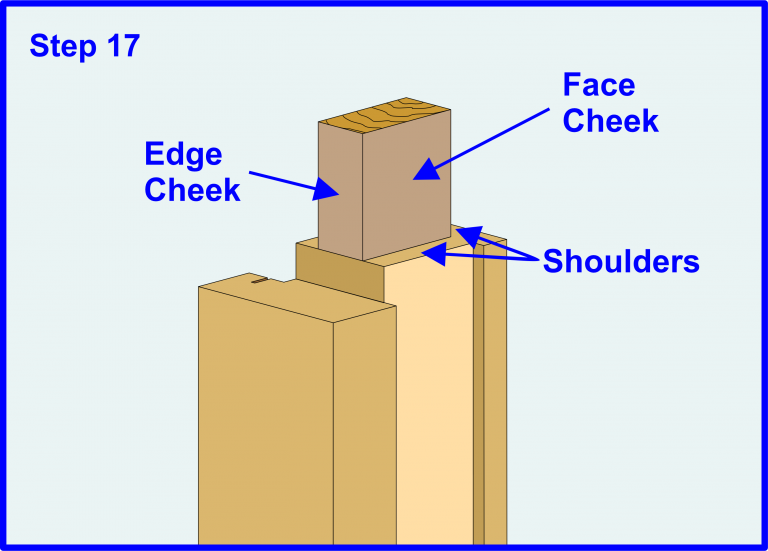
Through Mortice & Tenon Joints Step_17
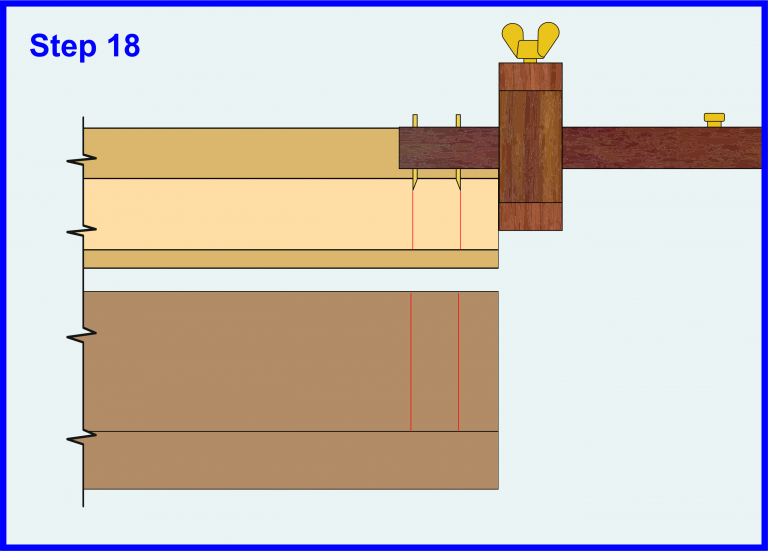
Through Mortice & Tenon Joints Step_18

Through Mortice & Tenon Joints Step_19
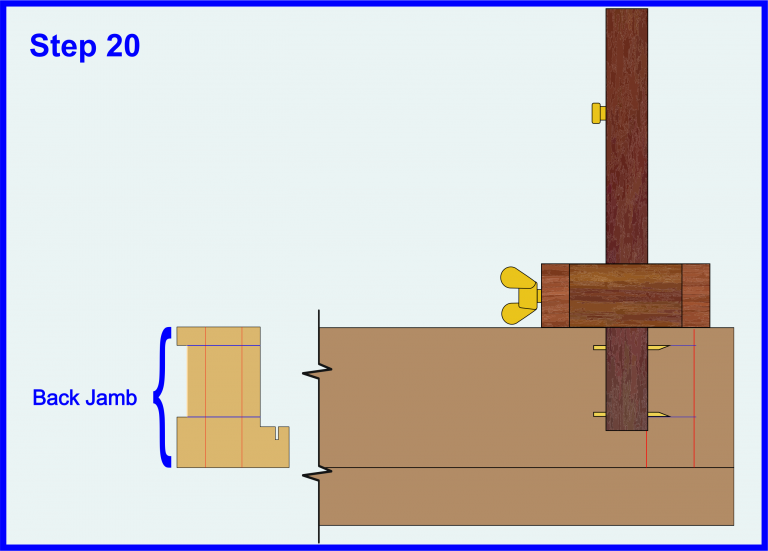
Through Mortice & Tenon Joints Step_20
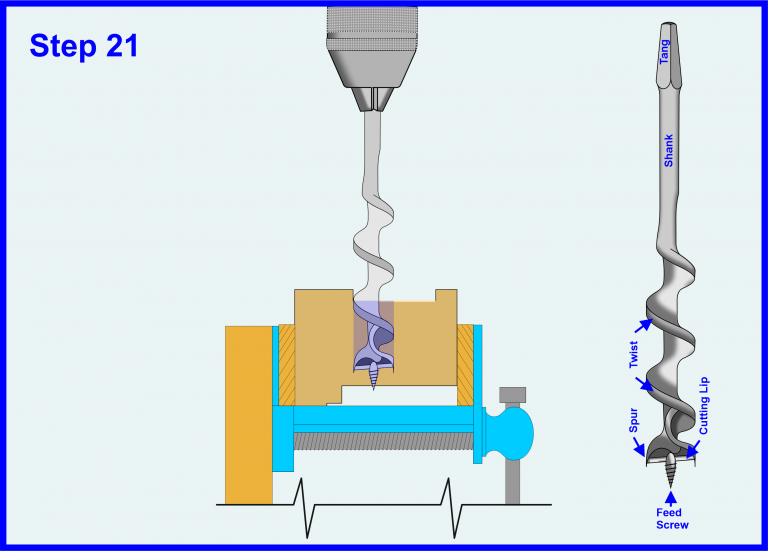
Through Mortice & Tenon Joints Step_21
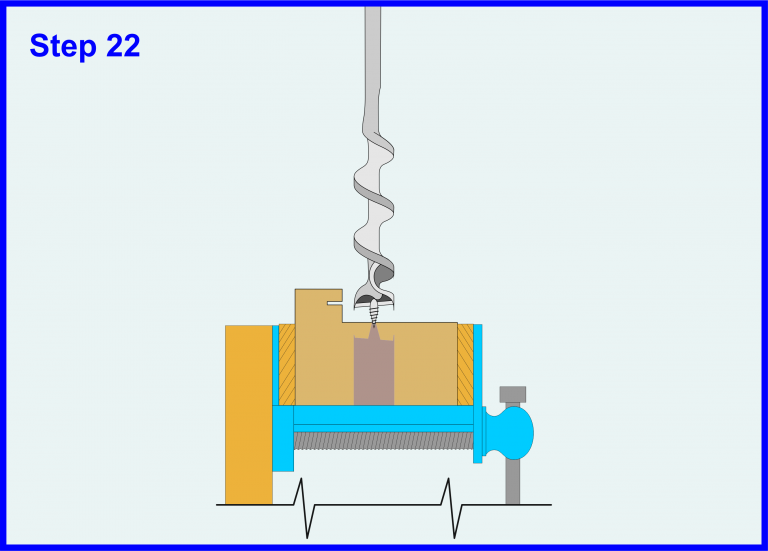
Through Mortice & Tenon Joints Step_22

Through Mortice & Tenon Joints Step_23
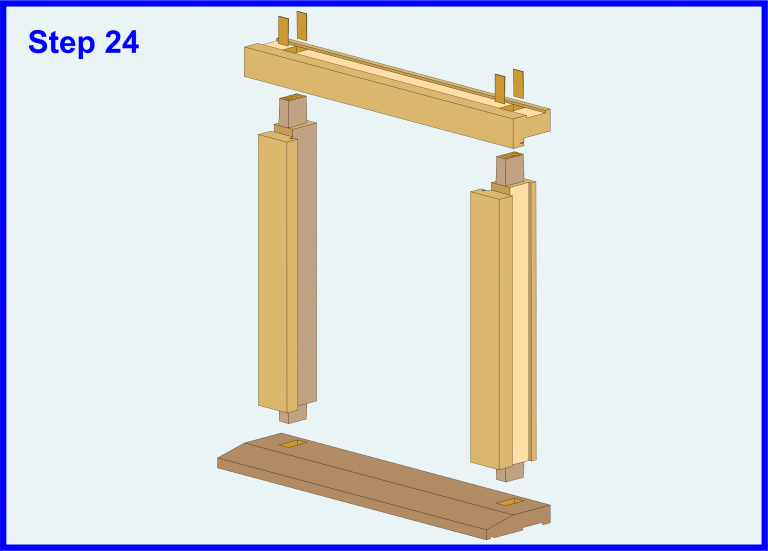
Through Mortice & Tenon Joints Step_24

Through Mortice & Tenon Joints Step_25
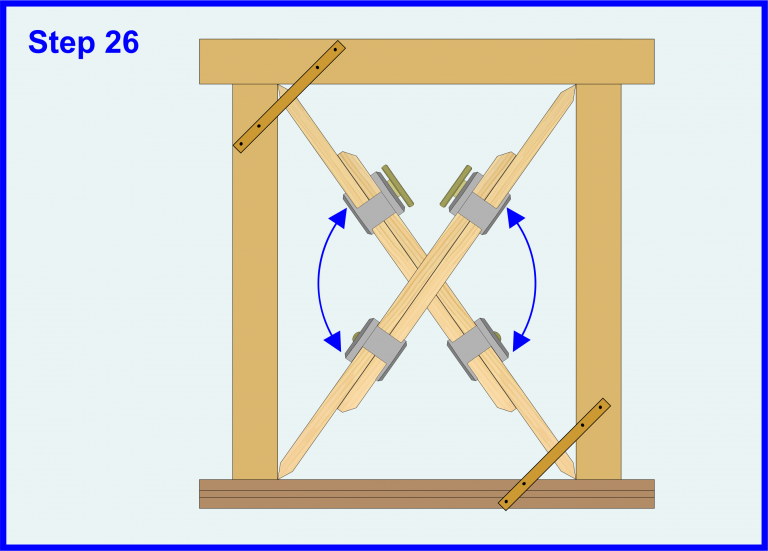
Through Mortice & Tenon Joints Step_26
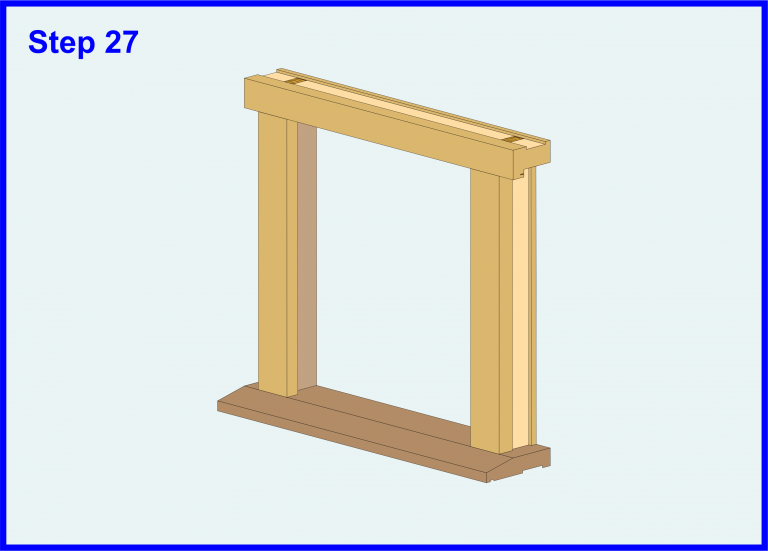
Through Mortice & Tenon Joints Step_27