

Protractor

Pencil
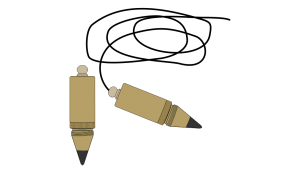
Plumb Bob
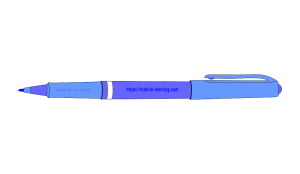
Felt Tip Pen

Selection of Screws
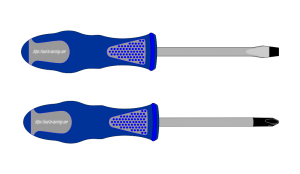
Screwdrivers
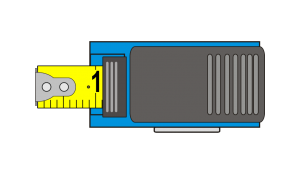
Tape Measure
Buildings Square

Teaching and learning resources for the construction industry with NVQ and Diploma Assessment Criteria
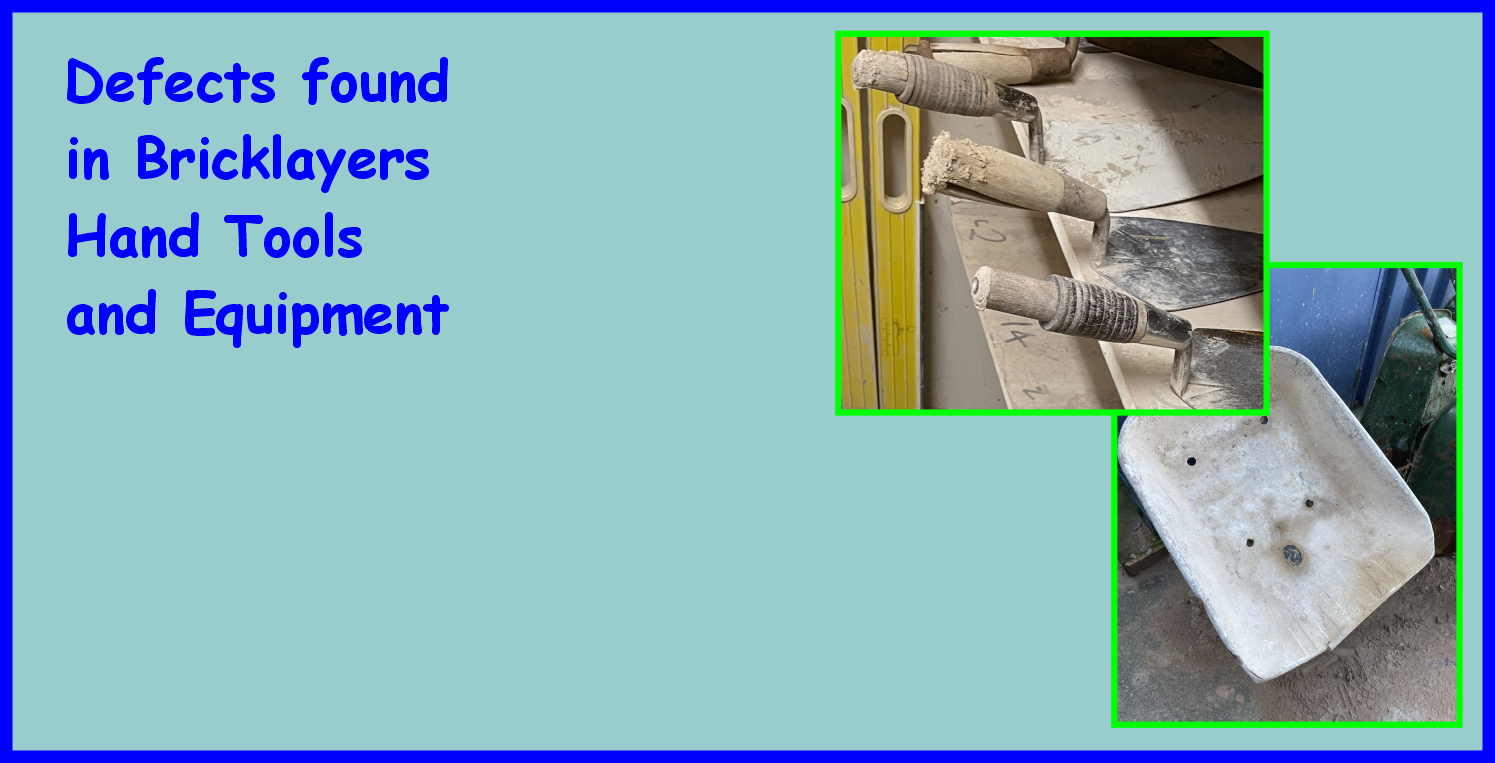
Great care should be taken of the spirit level as they are expensive and if ill-used can lead to inaccurate levelling and plumbing.
It is important to check the spirit level occasionally to ensure its accuracy.
Accuracy
All levels should have an accuracy tolerance with Certified in accordance with ISO 9001which will be published for you to check before purchase.
It is usually stated as “+ or – 0.Xmm per meter” so you can ensure you get the accuracy that you require
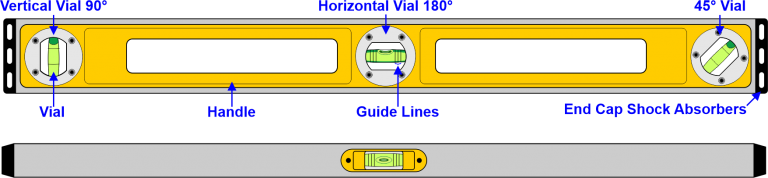
These are lines inserted into the tube or vial or in some cases they are painted.
These need to be clear and easy to see without impacting the movement of the bubble.
Protractor
Pencil
Plumb Bob
Felt Tip Pen
Selection of Screws
Screwdrivers
Tape Measure
Buildings Square
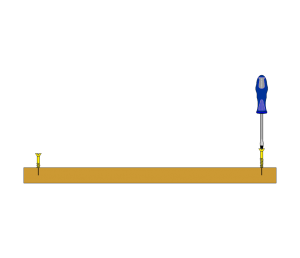
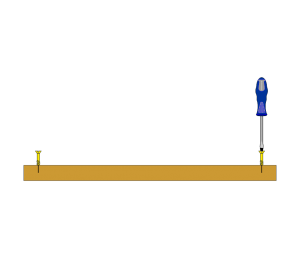
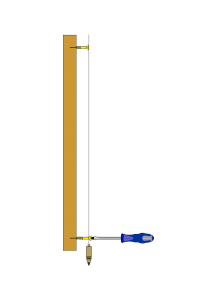
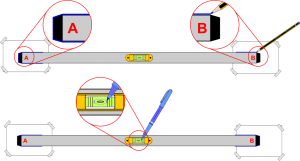
Step 1
Mark the centre line of the screw so that the screw head is just inside each end of the level, this will ensure when you reverse a level onto the screws that you are placing it in the exact position for accuracy
Step 2
Ensure when you place in the screws into your timber that they are upright and screw heads are flat to the surface of the level.
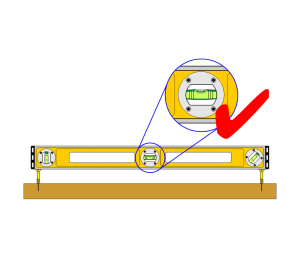
Step 3
Place a spirit level on top of the screw heads and check for level, if the bubble is in between the two guidelines then go to Step 6
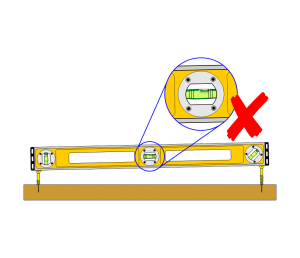
Step 4
If the bubble is touching the guideline to the right then you need to screw down on the other hand if the bubble is on the left-hand side of the guideline you need to unscrew the screw.
Step 5
After completing step four and you find the bubble in the centre of the two guidelines then proceed to the next step.
If you want to be more precise to in your accuracy than using your felt tip pen mark the end of the bubble on each side.
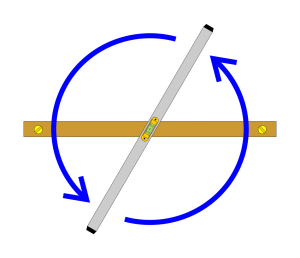
Step 6
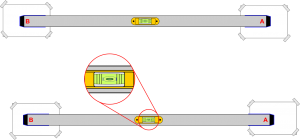
In this step reverse the spirit level onto the screws by turning it completely 280°
Step 7
The spirit level is average when the bubble is in the same position when reversing the level
Keep checking by reversing the level on the screws.
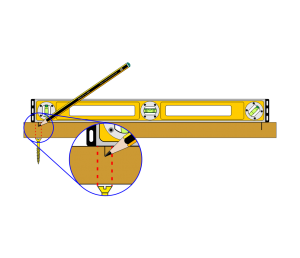
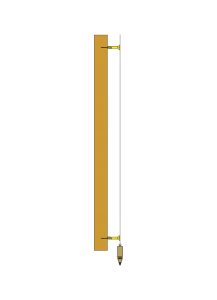
Step 1
Mark the centre line of the screw so that the screw head is just inside each end of the level, this will ensure when you reverse a level onto the screws that you are placing it in the exact position for accuracy
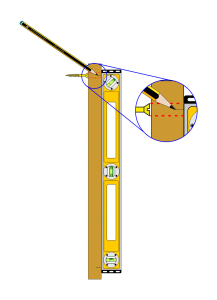
Step 2
Check that they are plumb with a plumb bob or with a spirit level that is known to be accurate, adjuster one screw preferably the bottom one until both screw heads are plumb.
Step 3
The accuracy of a plumb bob may be affected by windy conditions.
The plumb bob will tend to swing back and forth.
You can overcome this problem by bouncing the point of the plumb bob slightly up and down on the point.
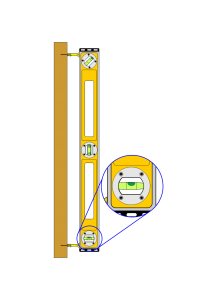
Step 4
If the bubble is between the two guidelines then their spirit level is accurate for vertical (Plumb).
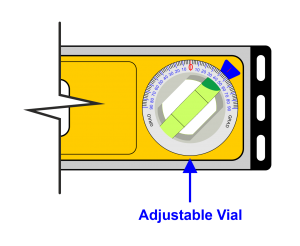
vials on some levels can be adjusted, if you find the bubble not in the centre of the guidelines then you need to adjust vial until the bubble is in the centre of the guidelines then go to the next step.
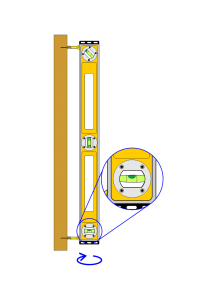
Step 5
in this step you need to turn a level around at 180° checked for plumb, if the bubble in the same position than the spirit level is accurate for vertical plumb.
What you need for this exercise is a piece of board long enough for the level to sit on, or even old wallpaper so that you can work on the paste inside.
If you haven’t got wallpaper or board you could use some A4 paper for each end of the level, securely fixed in place by Blu Tack or Sellotape.
you could use a felt -tip pen on a windowsill or kitchen work-top is light enough, make sure that felt tip is not a permanent marker.
Step 1
Try and find a flat level surface like a windowsill or kitchen work-top, then place a level and mark around each end of the level.
Using a felt -tip pen mark both ends of the bubble inside the vial.
Step 2
To check the level for accuracy pick up the level and reverse 180° and placed directly back onto lines previously drawn.
If the bubble is exactly in the same place before reversing the spirit level is accurate to the horizontal plane (Level)
Any difference is the degree of inaccuracy with that vial on the spirit level
The process for checking vertical plane (Plumb) is the same as above instead of placing the level on a horizontal plane it’s on a vertical surface.
Always best to check your spirit level for accuracy before starting any work or after dropping the spirit level during work activities.
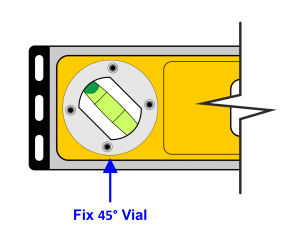
Scaffolding Magnetic levels help the scaffolder to work hands-free when adjusting or fixing Diagonal brace @ 45°, carpenters use 45° Vial for several uses like constructing a roof and other timber components for the house.
A good tradesman would check his spirit level 45° Vial from time to time especially if he’s starting a new project.
There are several ways of checking your 45° Vial this will depend on the surface area that you’re able to use, for example, if a wall needs painting or new plasterboard been erected this will be the ideal surfaces because they will be covered in a later date by materials.
If you haven’t got the above then a spare sheet of board or plasterboard will suffice, all you may have two resort to placing old wallpaper or paper to the vertical surface to check your 45° Vial
Step 1
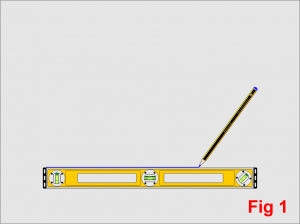
Using your spirit level draw a horizontal line (baseline Fig 1) making sure you do not use a felt tip if the prepared surface is going to be painted, the decorator will not be please with you because the felt tip will bleed through layers of paint.
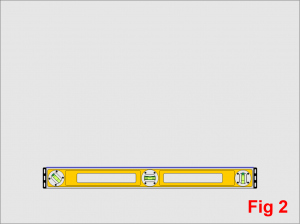
Double-check your baseline by reversing the spirit level on to the line to ensure that the bubble inside the horizontal vial is in the same position (Fig 2), by doing this you are also checking your horizontal plane (level) as previously mentioned.
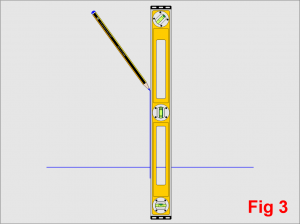
Step 2
Place your spirit level in the centre of your baseline and ensuring that the level is plumb then draw your perpendicular line which should be 90° to your baseline (Fig 3).
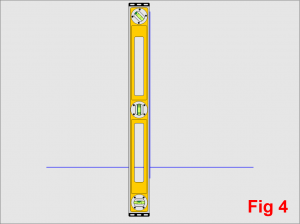
You can check your spirit level for vertical plane (Plumb) by reversing the level onto the opposite side of the line, if the bubble inside the vial is in the centre between two guidelines your spirit level is adequate (Fig 4).
Step 3
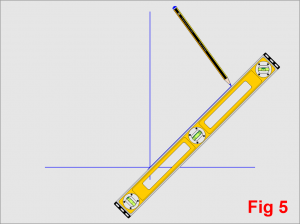
Place your spirit level so one edge of the level passes through the perpendicular line and the baseline, then pivot at that point and rotate upwards or downwards so that the 45° Vial bubble is centre between the two guide marks.
Holding the spirit level study draw a line on the side of the level which strikes through your baseline and your perpendicular line, this line should be at 45° (Fig 5).
Repeat this process on the opposite side of the perpendicular line (Fig 6).
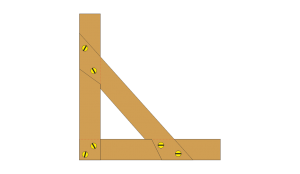
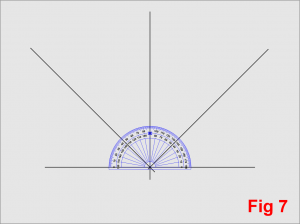
To check your the 45° you can use your protractor by placing it on the three striking points on your baseline (Fig 7).
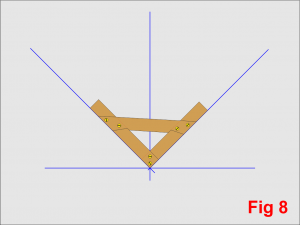
If you have a building square which you know is accurate, place the corner of the building square on your strike points on the perpendicular line and rotate the building square so it lines up with one of your 45° lines, then simply check to see if it’s in line with the opposite 45° line (Fig 8).
If you haven’t got a protractor do the following steps
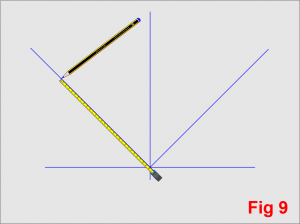
Step 4
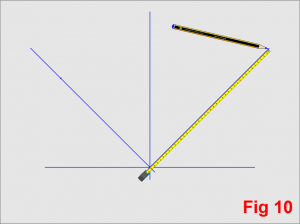
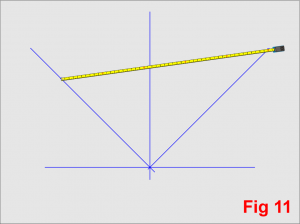
Another method is used in 3-4-5 method with the aid of a tape measure, simply mark one of your 45° lines at 300mm (Fig 9) and the opposite line at 400mm (Fig 10) to test to see if it’s accurate measure between the two points should be 500mm (Fig 11) basically the 3-4-5 method.