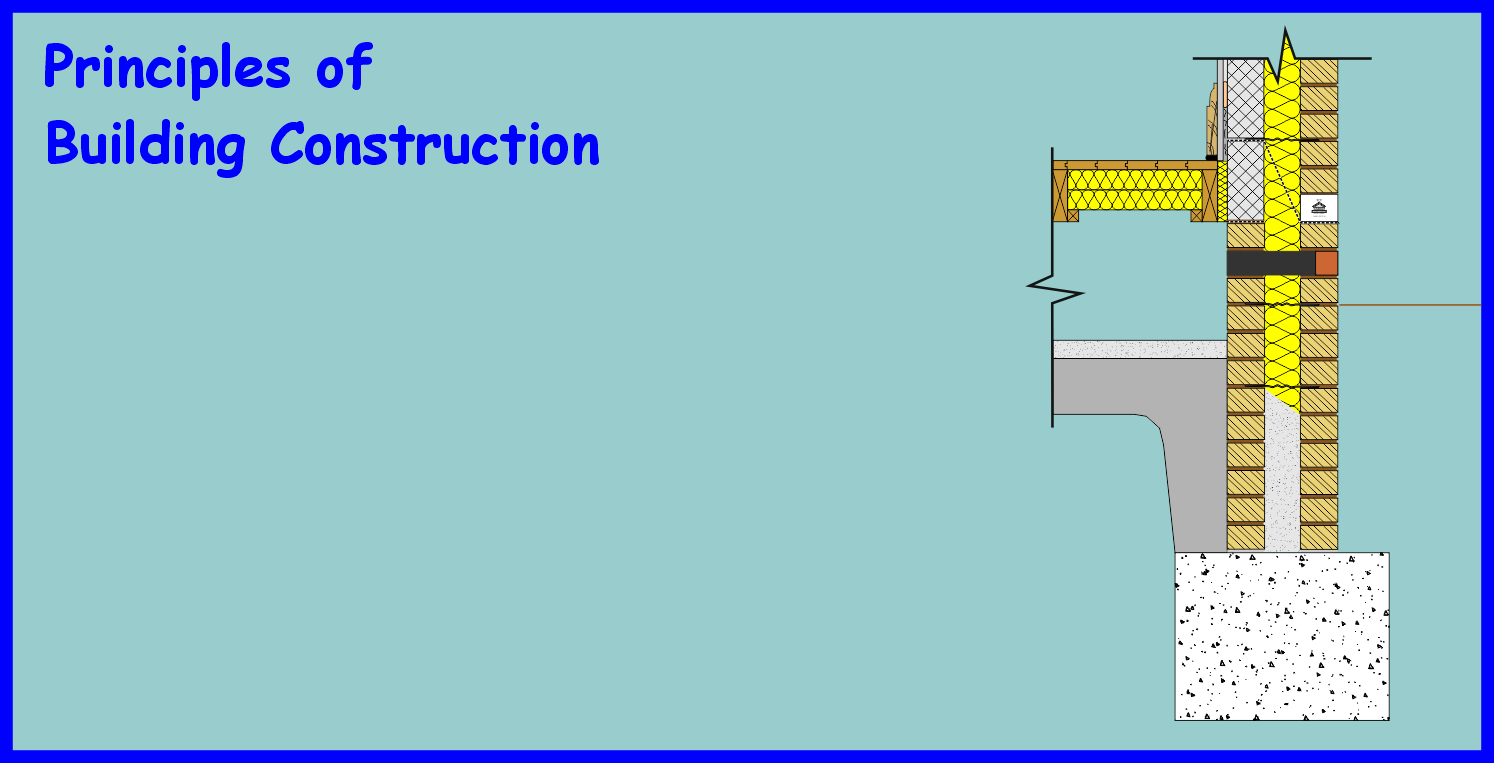

Wall Ties in a Cavity Wall
Location of Wall Ties Around Door Opening
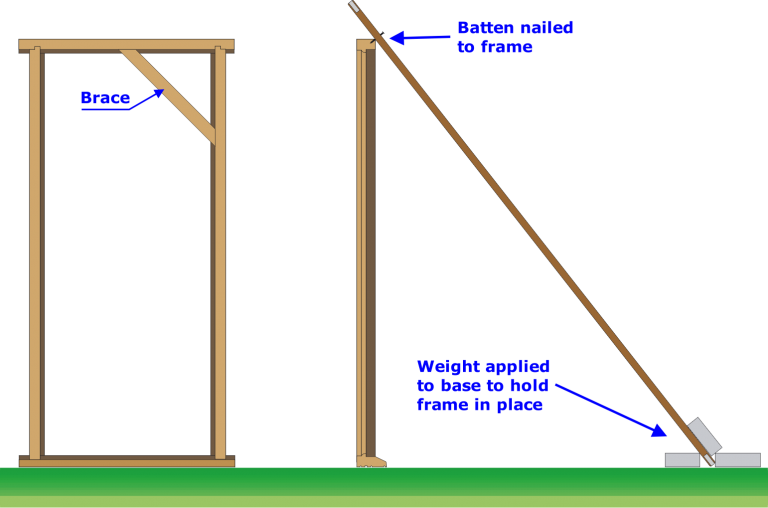
Built-in Frames
Securing Frames in Place

Securing Frames in Place

Frame fixings
Teaching and learning resources for the construction industry with NVQ and Diploma Assessment Criteria
Unit 206 Construct cavity walling forming masonry structures
The aim of this unit is to provide the learner with the
knowledge and skills to construct walling to form masonry structures
The learner will:
5. know how to form openings in cavity walling.
The learner can:
Openings in cavity walls are constructed by the bricklayer to allow for the installation of doors and windows.
The methods used to set out and create an opening vary according to the type of door or window frames specified.
Openings are also formed to allow for services like water and electricity below ground, but in this section we’ll concentrate on forming openings for doors and windows.
For example, if softwood timber frames are specified, they can be ‘built-in’ to the masonry as work proceeds.
The frame is set up and temporarily braced in the correct position on the masonry at the door or window sill level and the brickwork or blockwork is carefully formed around it.
A range of different types of frame fixings to secure the frame can be built into the bed joints of the masonry at the required spacing as the work around the frame is built up.
The fixings are simply screwed into the side of the frame
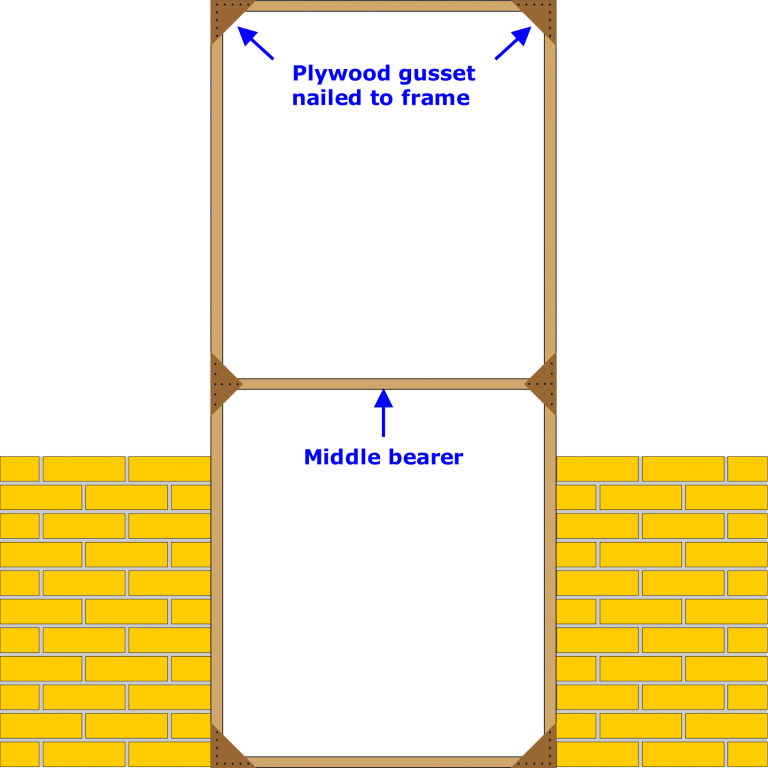
The dimensions of the dummy frame are usually increased by 10mm or so, to create an opening slightly larger than the finished
If PVC frames are to be used, they will need to be installed after the masonry work is completed since they can easily be damaged during construction activities like bricklaying.
The openings are formed using ‘dummy’ frames: these form a temporary profile around which the masonry can be built.
They are later removed to leave an opening ready for the PVC frames to be inserted into.
This method might also be used when expensive hardwood frames are specified which could suffer damage during the building phase.
The dimensions of the dummy frame are usually increased by 10mm or so, to create an opening slightly larger than the finished frame – this allows ease of fitting later
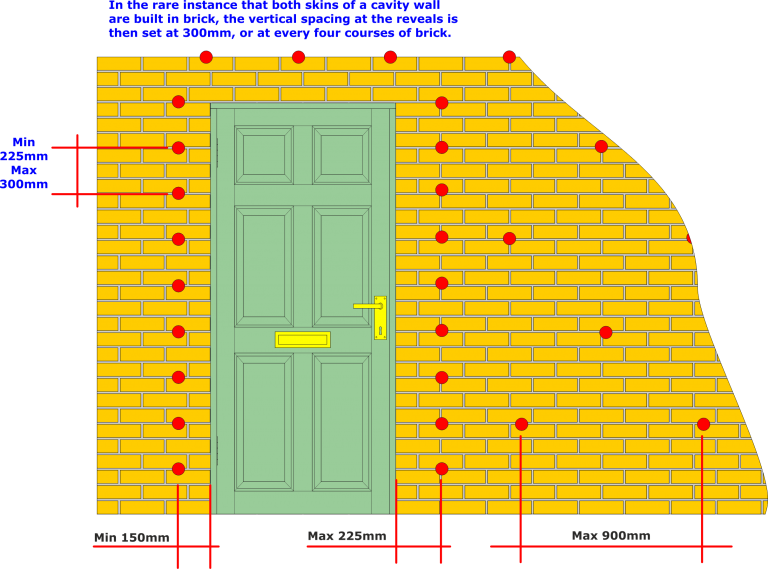
Wall Ties in a Cavity Wall
Creating an opening in a cavity wall will inevitably cause an area of weakness in the structural integrity at that location.
To improve the strength at the opening, a greater number of wall ties are built into the jamb area either side of the opening.
The vertical spacing of wall ties in a cavity wall is set at 450mm.
This spacing is reduced to 225mm at the reveals so that the strengthening effect provided by the wall ties is significantly increased.
In the rare instance that both skins of a cavity wall are built in brick, the vertical spacing at the reveals is then set at 300mm, or at every four courses of brick.
Location of Wall Ties Around Door Opening
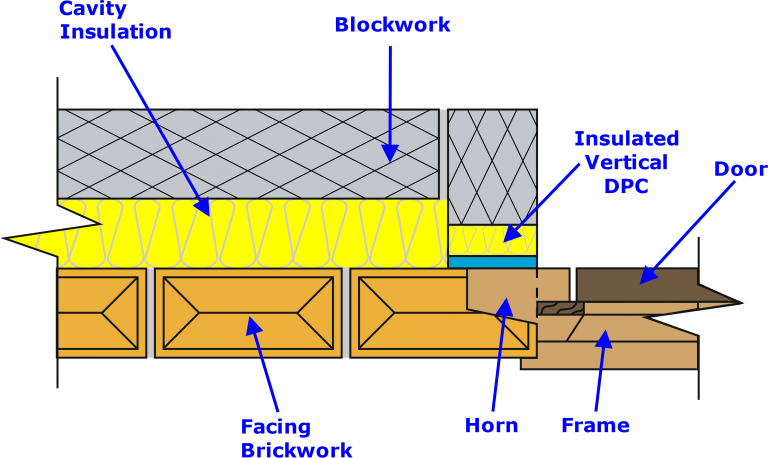
Built-in Frames
Built-in frames are fastened in place as the brick courses of the wall are being built.
The frames, whether window frames, or door frames are manufactured so that the head and the sills are longer than the width of the frame.
The extensions to the frame are called ‘horns’ and before the frame is fitted, the horns at the head have to be trimmed and shaped or ‘splayed back’ to allow the facing bricks to cloak the head.
Securing Frames in Place
This can be achieved by using:
• Metal cramps.
• Wooden pads or ‘slips’.
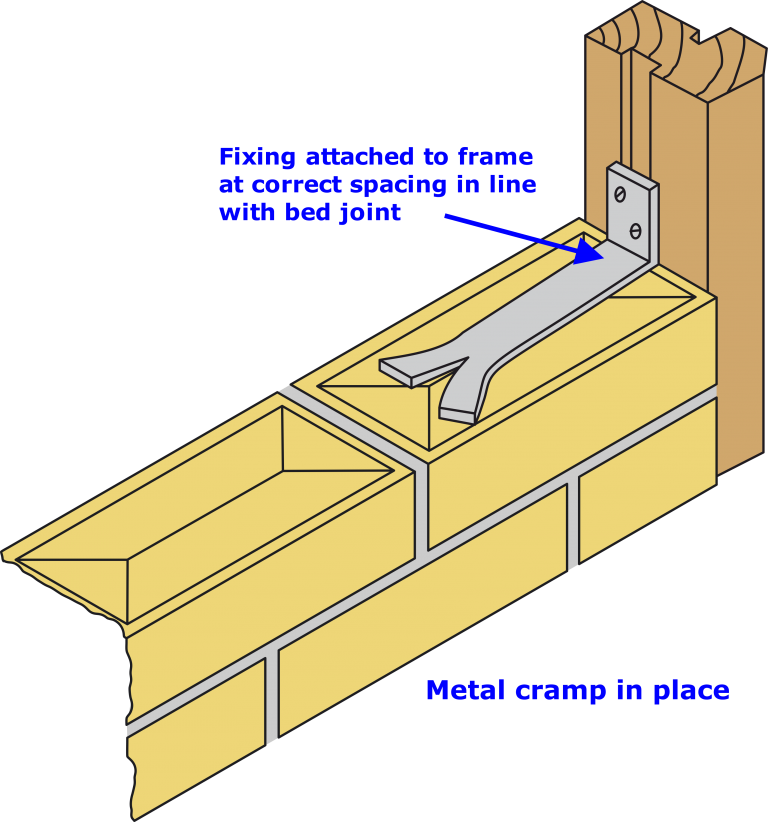
Metal Cramps
This method of securing the frames makes use of specially designed metal cramps which are fixed to the back of the frame and positioned so that the cramp coincides with a horizontal joint.
The cramp is laid on top of the bricks and then the wall is built on top of it.
Care must be taken when using this method that the frame is plumb and level.
Failure to do so may lead to problems occurring at a later date when the reveals have to be plastered and the doors have to be fitted.
Securing Frames in Place
An alternative method of securing frames is to use wooden fixing pads or ‘slips’.
These pads are small pieces of timber 90mm x 90mm x 10mm thick.
The pads are placed within a horizontal joint at intervals of 4–6 courses.
The pad should be placed so that the grain of the timber is at 90˚ celcius to the fixing edge of the brickwork.
These pads can be built in as the work progresses and the frame can be fitted at a later date.
It is still advisable to splay cut the horns at the head of the frame and build them in to secure the frame at the head.
Frame fixings
Once all the main building work is completed, the door and window frames can be fitted and fixed in place within the pre-formed openings.
The frames are usually timber or UPVc, and they are manufactured to suit the preformed openings.
The fixing of the frames will depend upon the construction specification of the building.
The development of, and improvement of, modern fixings has led to most frames being fixed in place using these types of fixings.
The commonest type consists of a plastic sleeve which encases a toughened zinc screw. When the screw is tightened the sleeve expands, securing the frame in place.
These types of plastic plugs are manufactured from polythene or nylon, and have good holding properties, but they can be affected by temperature changes.
However, because they are hidden within a structure or material, direct sunlight does not cause any deterioration.
They are manufactured as individual plugs with a variety of lengths, diameters and shapes, and are ideal for the fixing of window and door frames as they can be fixed in place more quickly without having to remove the frame before drilling takes place.
The frame and the background material are drilled at the same time and the fixing plug inserted through the frame into the background and then tightened in situ.
Once the frame has been fixed in place, the outside and inner edges of the frame can be sealed with waterproof mastic which will make the frame completely water tight.