
Teaching and learning resources for the construction industry with NVQ and Diploma Assessment Criteria
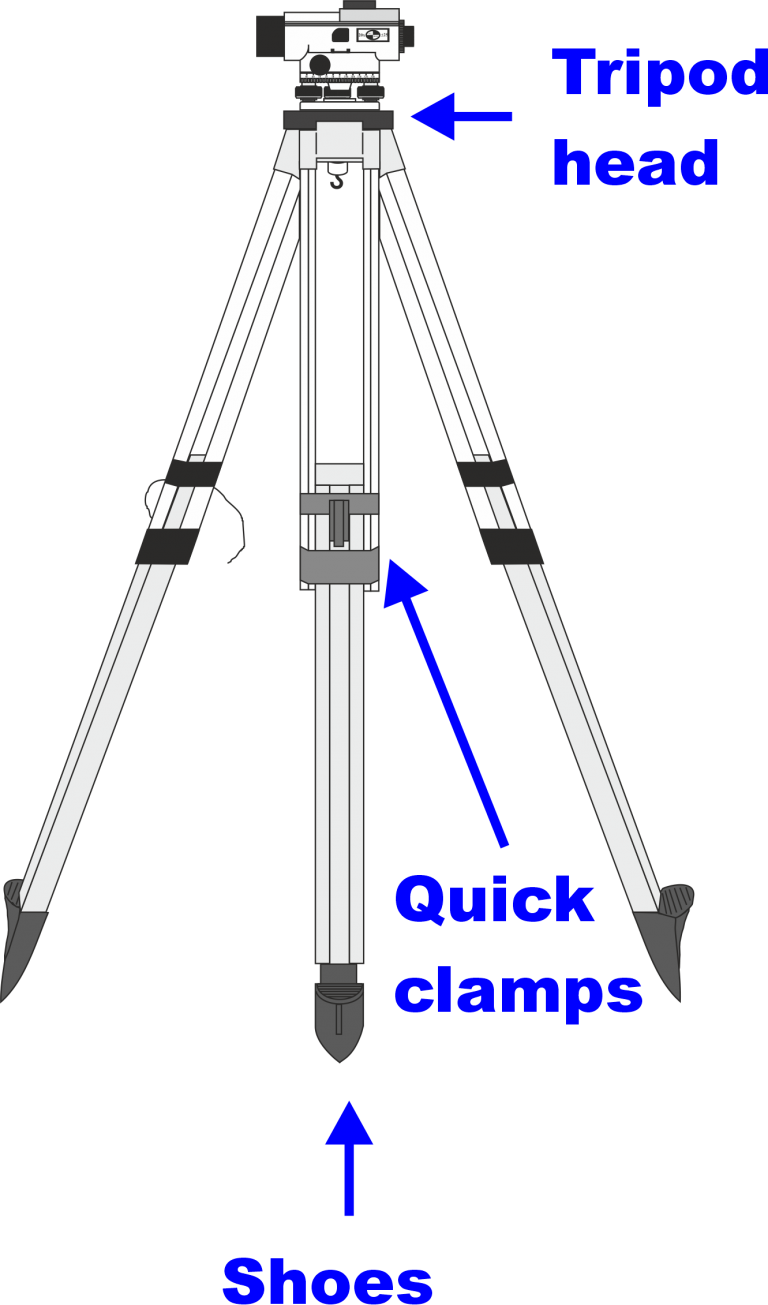
1. Extend all legs of the tripod to their full length.
2. Splay the legs slightly apart so the tripod is stable and dig the shoes in to the ground, if possible, by standing on the plate above each point.
3. Adjust the length of the legs so that the top of the tripod is roughly level and no higher than your chin.
4. Remove the level from the carry case carefully, checking that the thread on the base of it is clean.
5. Sit the level centrally on top of the tripod head, and hold it there with one hand.
6. With your other hand, reach between the legs of the tripod for the retaining screw. Lift this and screw it in to the level until the level is locked tightly on to the tripod.
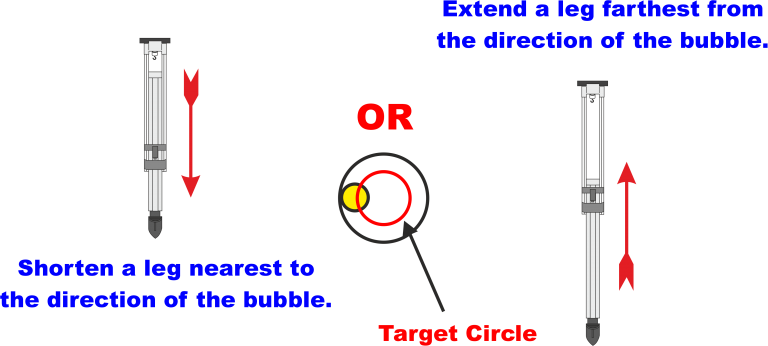
8. Swivel the telescope level so one of the legs are closest to the bubble.
9. Adjust the legs to bring the bubble towards
the centre of the target circle.
Generally, two legs have to be adjusted to center the bubble
into the target circle.
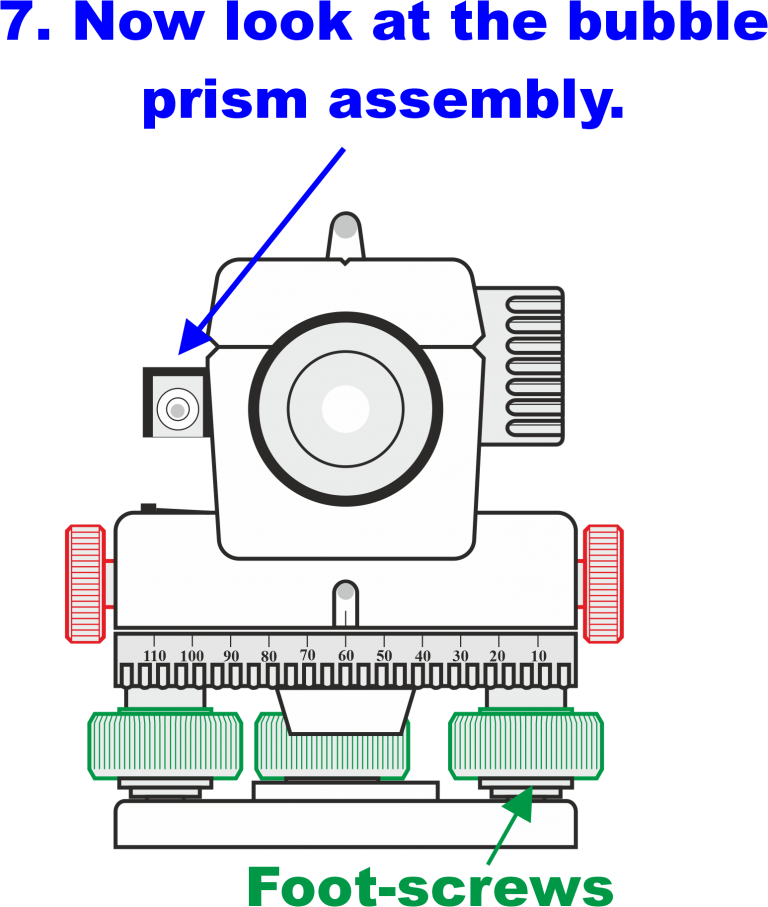
10. Finial adjustment use the foot-screws to complete centering of bubble in the prism assembly.
When the bubble is dead centre on the target circle, the user should focus the cross-hairs and then the image.
The level is then ready for use.