Water Level Kit Fig 1
Water Level Kit Fig 2
Water Level Kit Fig 3
Teaching and learning resources for the construction industry with NVQ and Diploma Assessment Criteria
Water Level Kit Fig 1
1. Fill the PVC hose with water directly from a tap or by syphoning from a container.
2. When the hose is full, fit a graduated tube to each end. Remove the caps from both tubes.
Top up with water and replace both caps leaving the vents open.
The water level in both tubes should be within the graduated scales when held together.
3. Both vents should be closed when the level is not in use and the tubes kept upright.
This will prevent the loss of water.
Water Level Kit Fig 2
4. Ensure that there are no air bubbles in the level as this will cause inaccurate readinqs.
5. To remove air bubbles open both vents.
Hold one graduated tube in the vertical position.
Lower the other end at 450 angle so that it is well below the level of the first, until a little water flows out.
This action will allow any air bubbles to escape, top up with water if necessary.
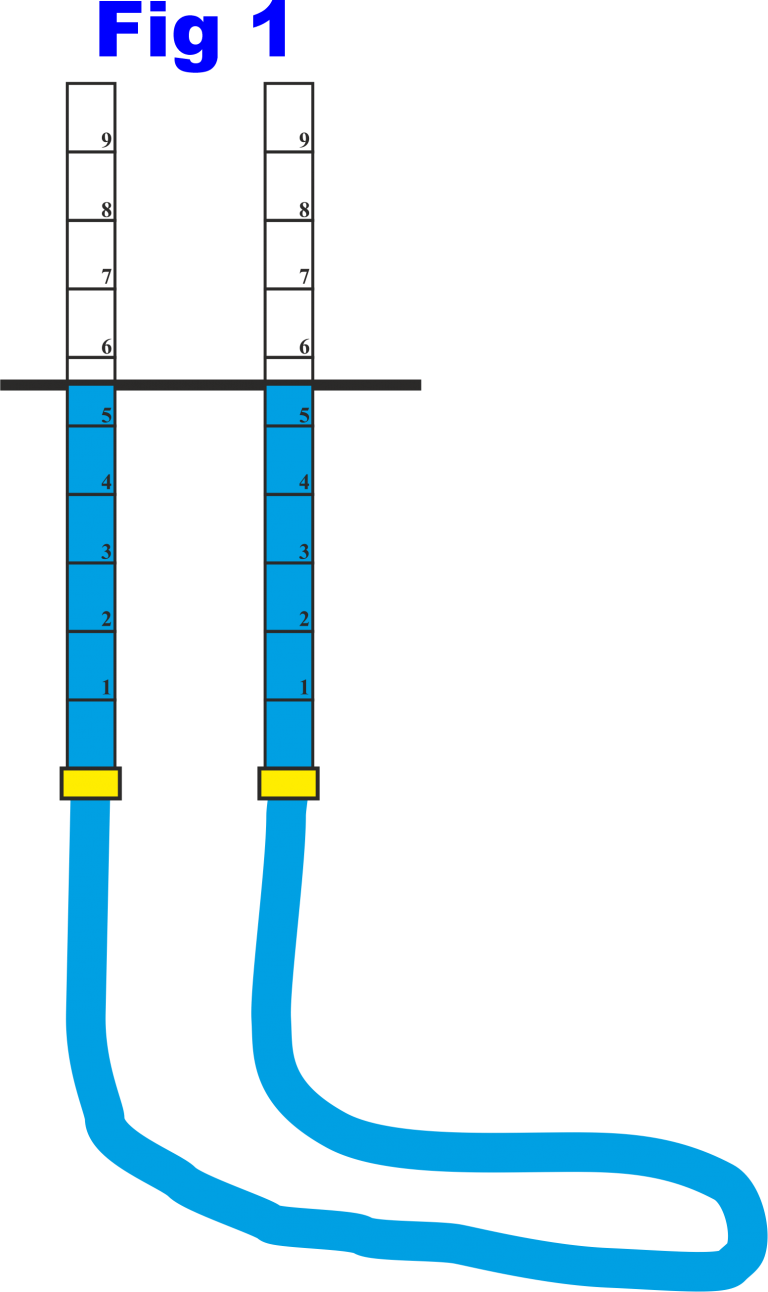
6. With both vents open, hold the graduated tubes side by side.
The water levels should be the same (See fig.1).
If not, there are still air bubbles present.
Repeat step 5 until the water levels are equal.
Note the graduation line at which this occurs.
Water Level Kit Fig 3
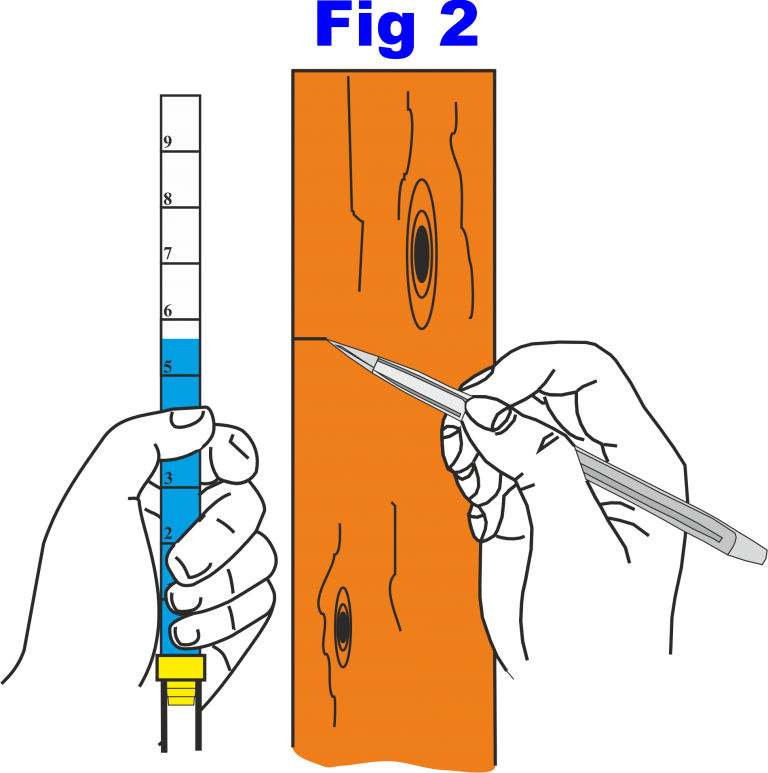
7. Place one graduated tube with the graduation determined in step 6 to exactly
coincide, with the established level (See fig.2).
Both vents must be open when leveling.
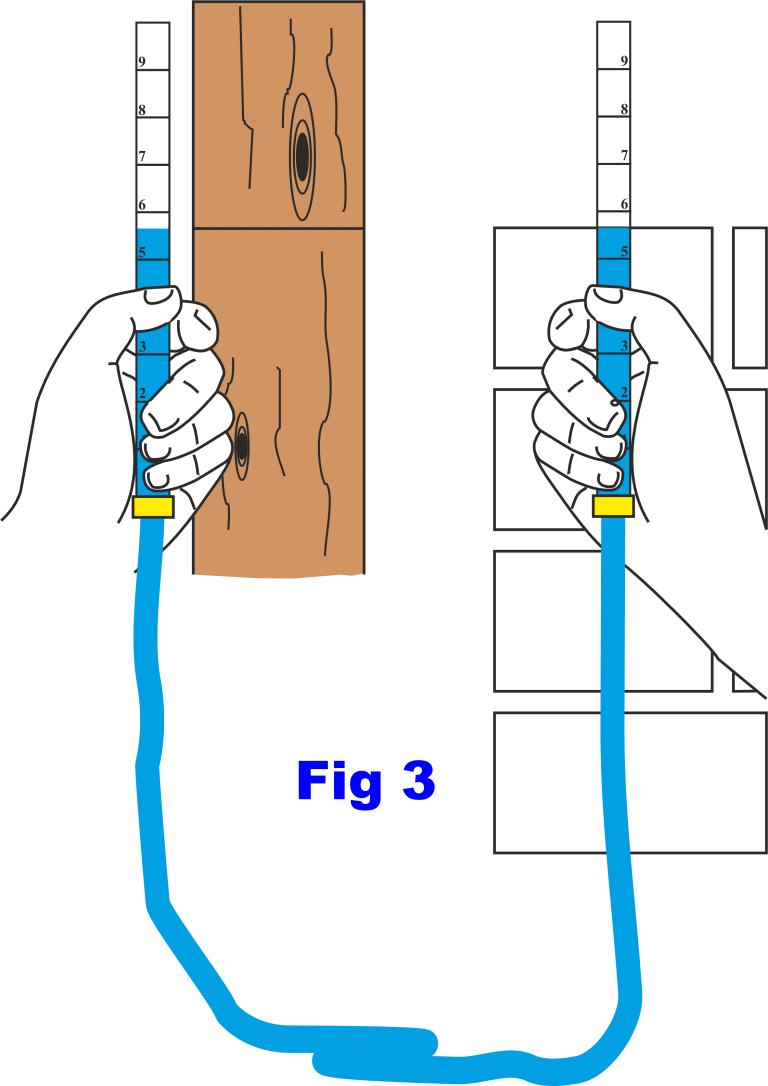
8. Place the second tube where the second water level is to be established.
Adjust the height of the tube until the water settles at the same graduation line as in steps 6 & 7 (See fig.3).
9. Mark off new level, close both vents after leveling and keep the tubes upright.